We recently launched our YouTube channel for IncomeDiary. Already, we have had a lot of people contact us asking how we created our short videos. We heard you, so here are the step-by-step instructions below.
Tools you will need:
- Notepad
- Voiceover editing tool
- Image and video editing tool
- Calculator
Step 1: Research Fun and Relevant Facts
Start by gathering interesting and relevant facts for your video. Fun facts keep your audience engaged, so make sure to find something that captivates! Below is just an example of how we collected our facts. We use Forbes and other refutable websites as our resources. Your data gathering depends on the topic you want to cover.

Step 2: Create a Script
Based on your research, write a script divided into three parts:
- Opening: Start with a hook to grab attention.
- Body: Highlight the key points of your topic.
- Closing: End with an ultimate lesson that leaves viewers thinking.
The script below is what we used for Jack Ma’s short video.

Step 3: Add Voiceover to Your Script
We use Speechify Studio to add a narrator to our text. There are three benefits from choosing this over a traditional narrator: it’s cheaper, more efficient, and it sounds professional and realistic. For only $69 a month, you receive four hours’ worth of voiceover credits, along with other benefits, and you can choose from a variety of voices and languages. Below are the steps to add a voiceover to your script on Speechify Studio.
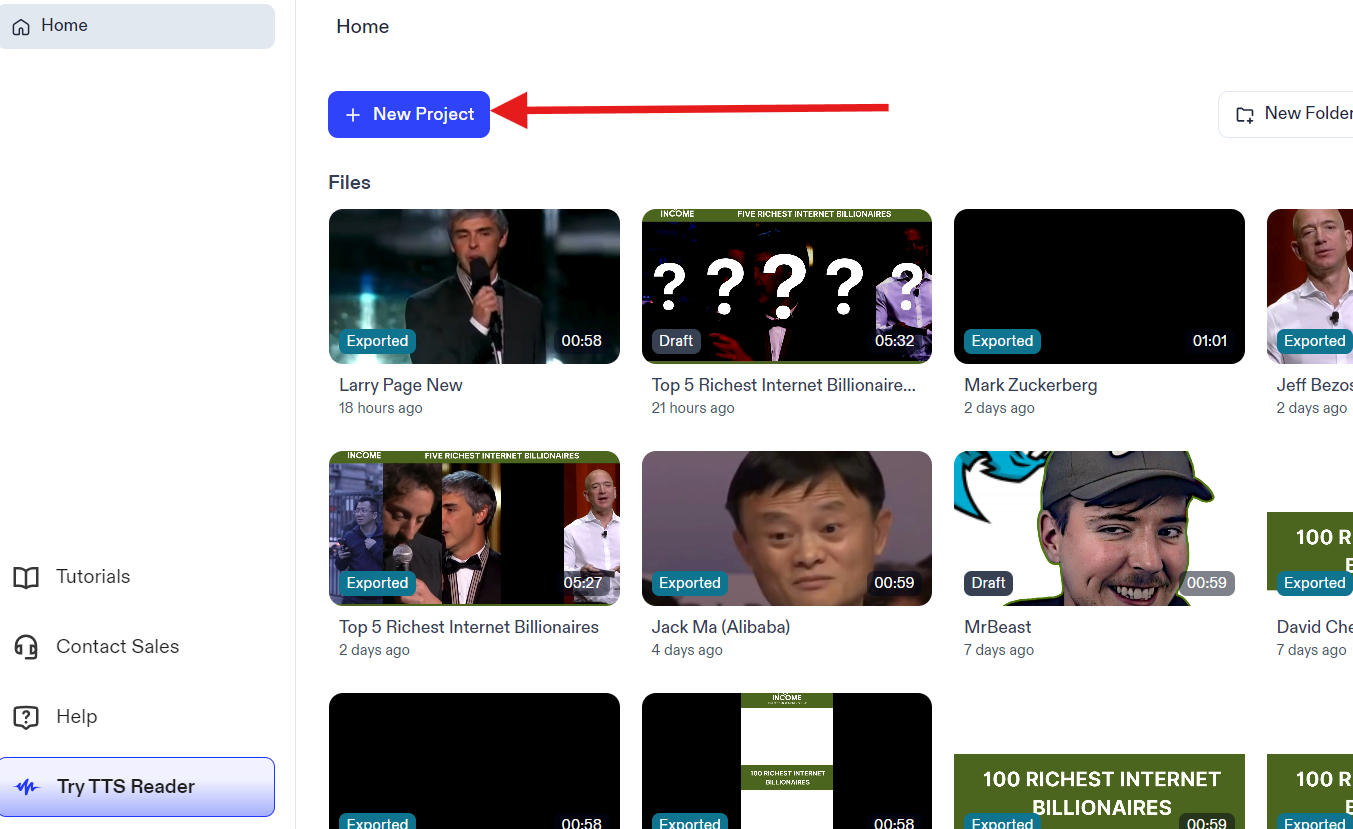
- Click New Project.
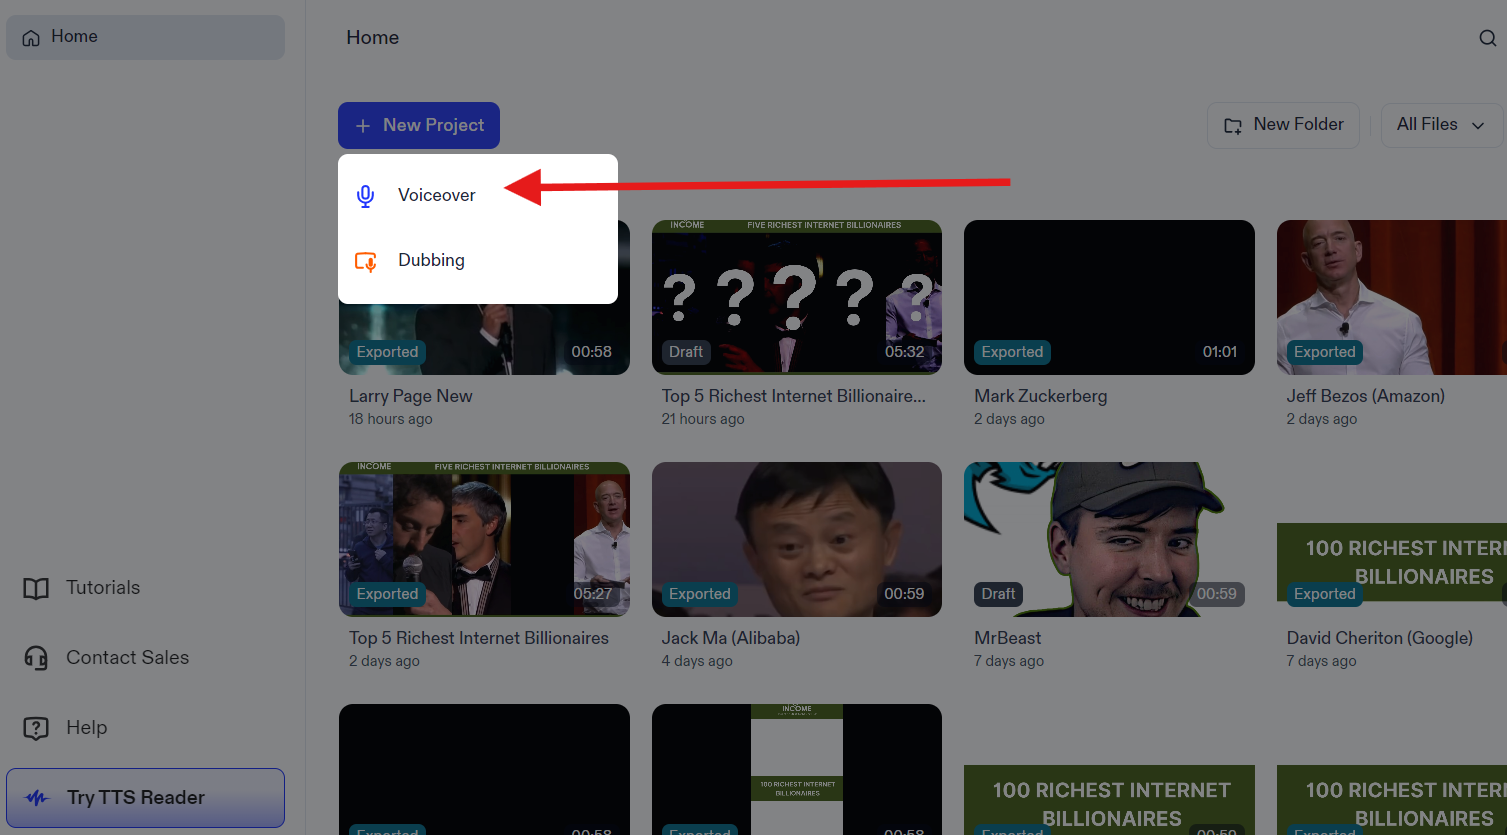
- Click Voiceover.
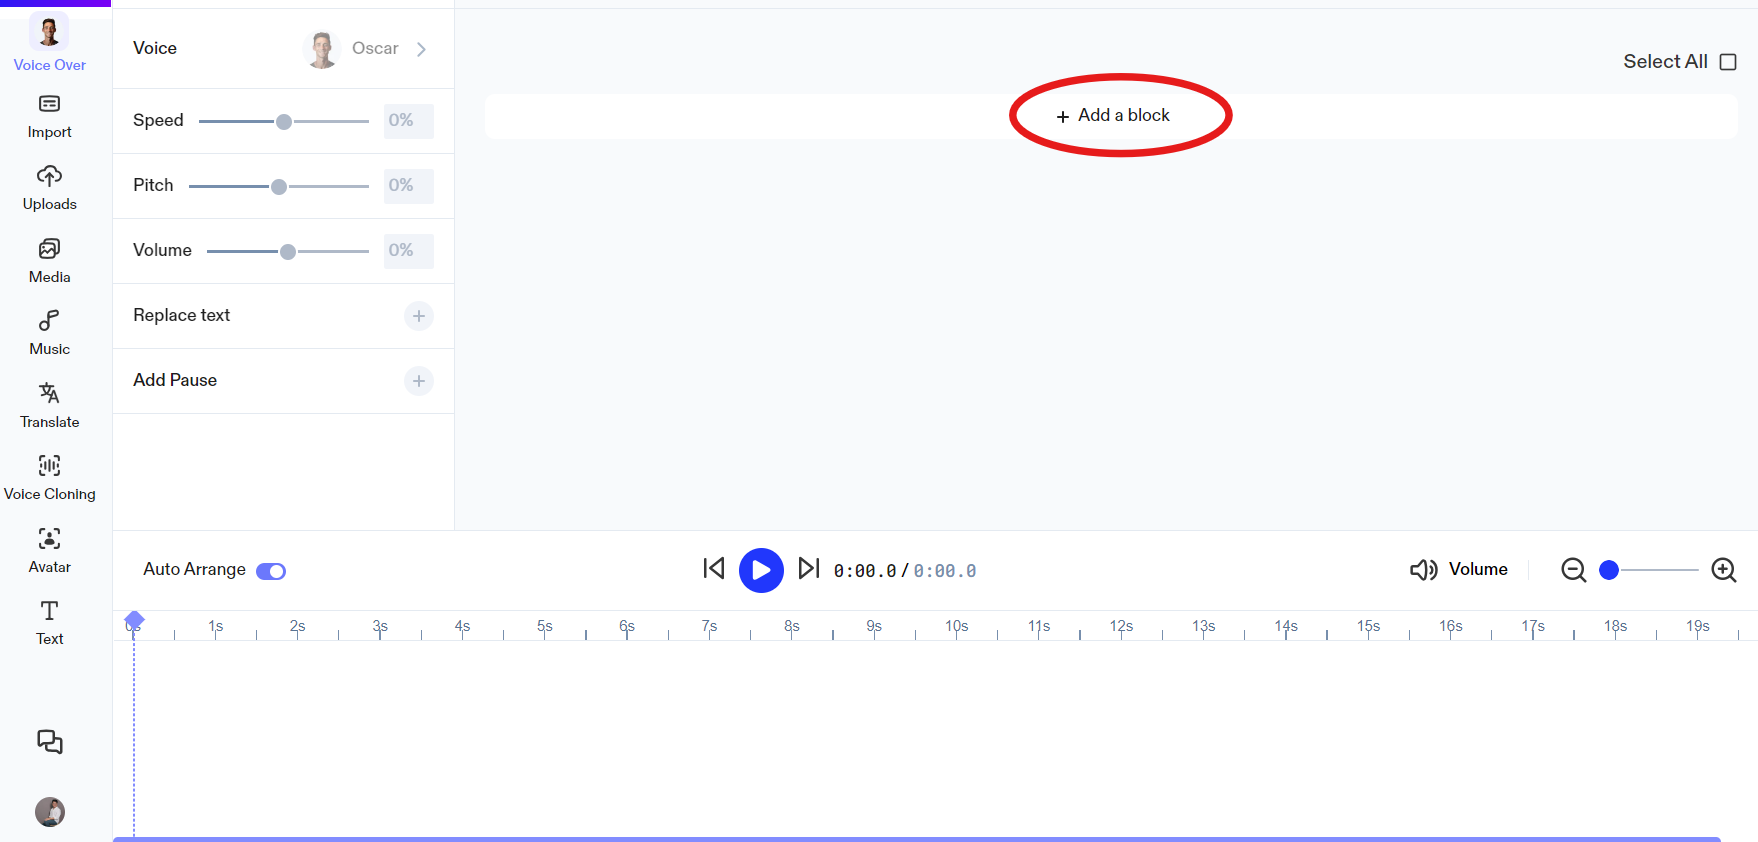
- Click +Add a block.
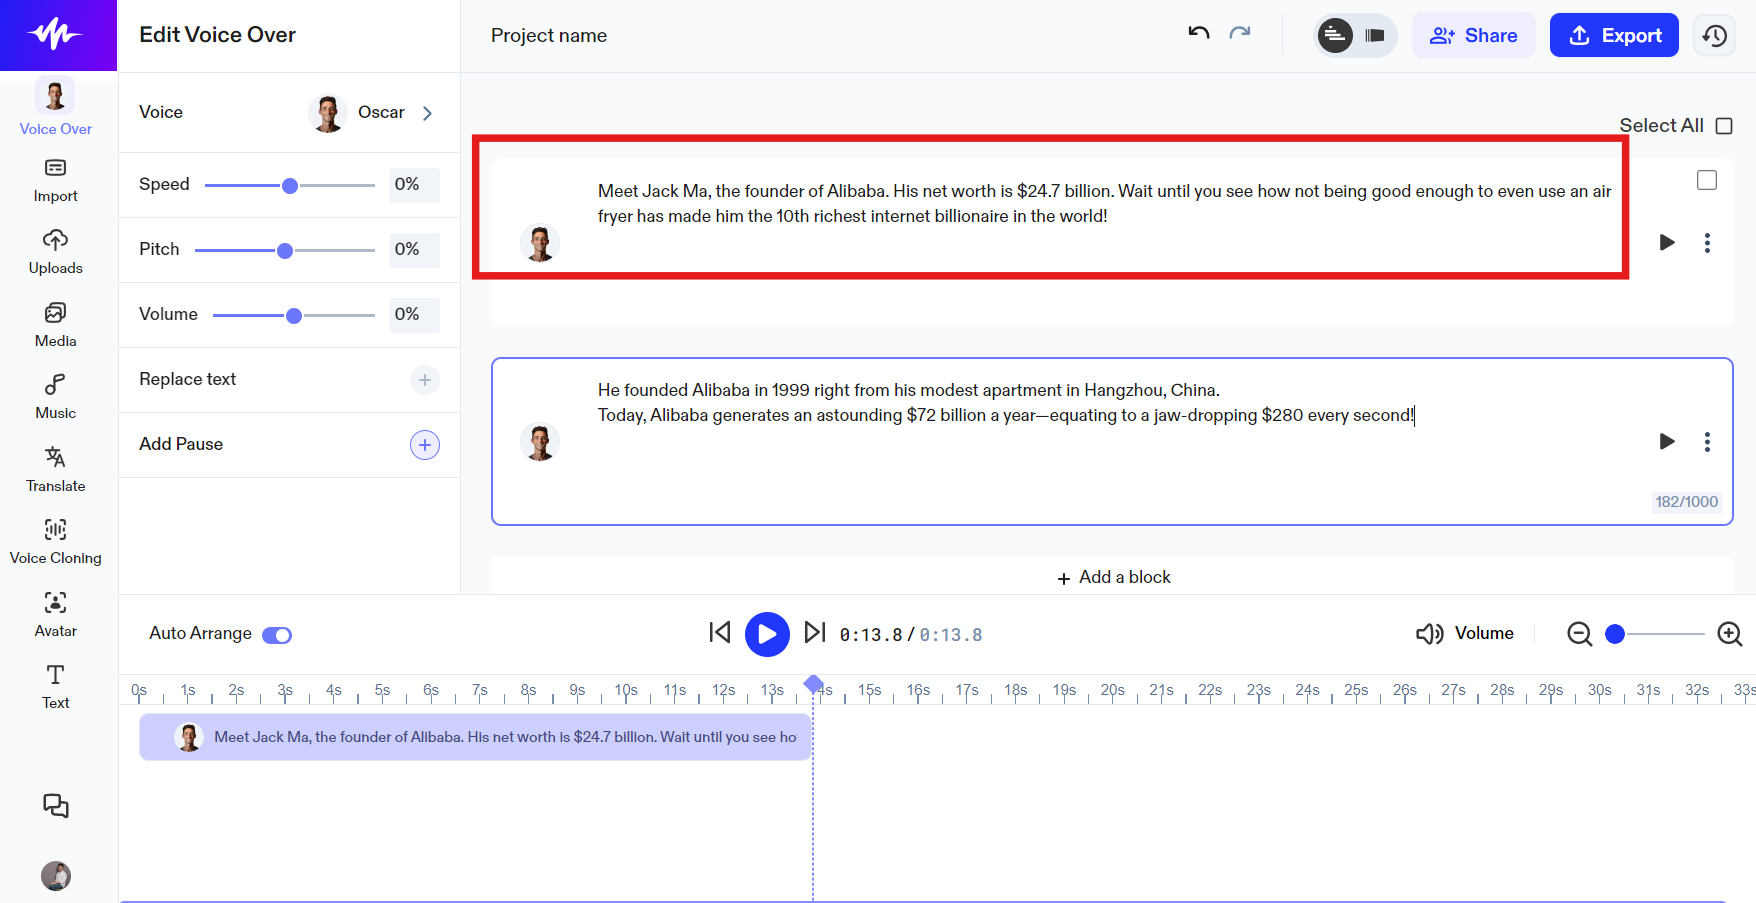
- Paste or type the script in the block.
If budget is an issue, Murf AI is a similarly excellent tool you can use.
Step 4: Refine the Script
Make sure to refine your script to fit within 60 seconds. Keep it short and simple. For instance, the script below is 26.6 seconds; you want to trim it below 60 seconds.
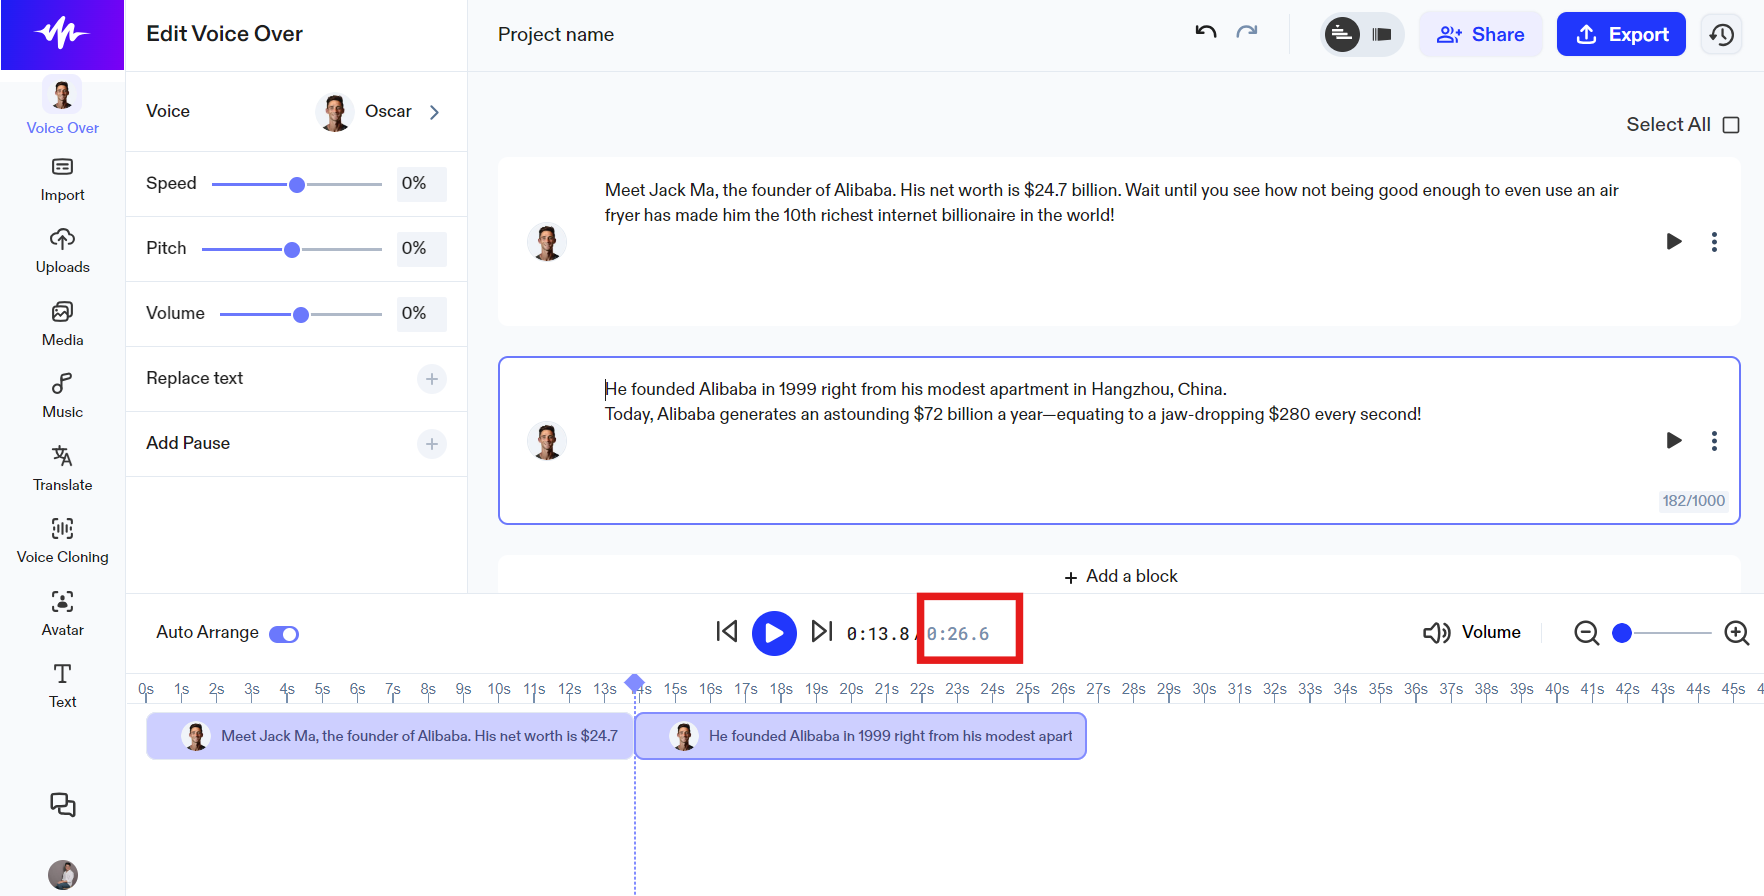
You can do this by doing two things: by rewriting your script or by adjusting the speech speed of the voiceover.
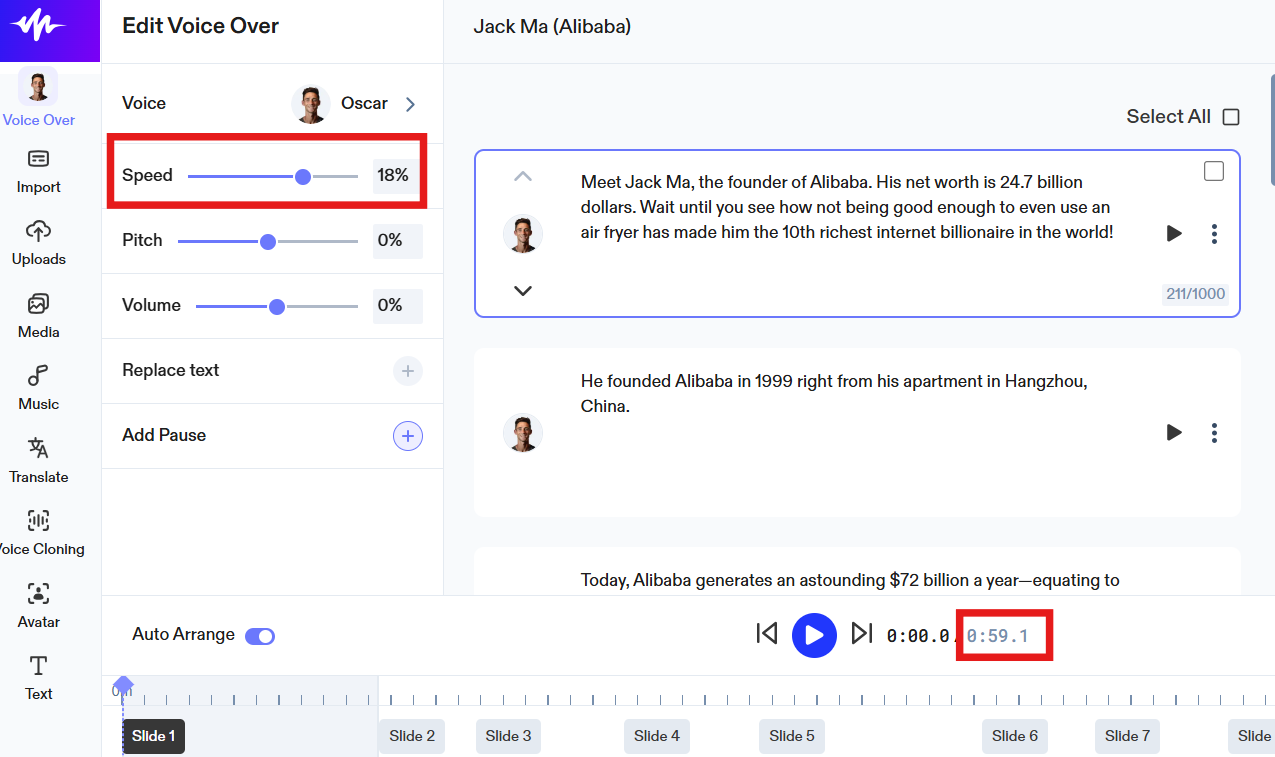
We default between 18% and 23%. The voiceover sounds more upbeat and really works well with short videos.
Step 5: Create Visuals
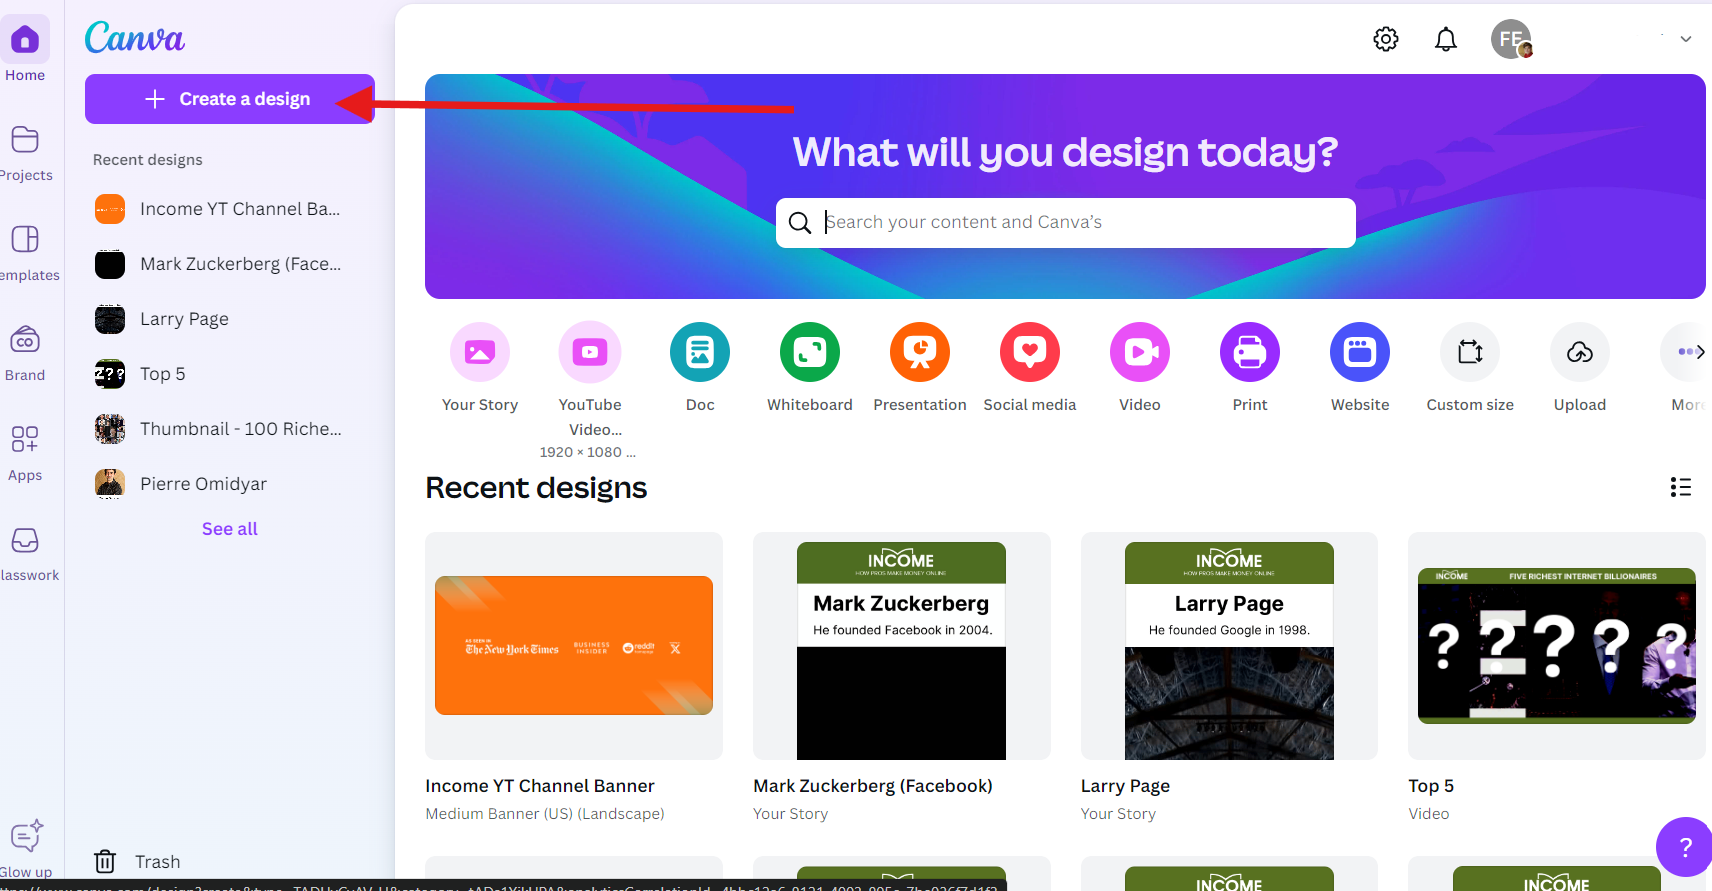
Next, design visuals that complement your script. We use Canva Pro to create and design our visuals. Incorporate photos and videos that resonate with your content.
Sync them with the voiceover blocks to ensure everything flows seamlessly. We use “play and pause” to get the right timing. Let’s say you want a particular visual to appear with a specific spoken word. Play the voiceover and pause at the word where you want the visual to show up.
In the example below, we wanted his net worth to appear when spoken. We did this by doing the following:
- Play the voiceover block and pause at 3 seconds because that’s when the net worth was spoken.
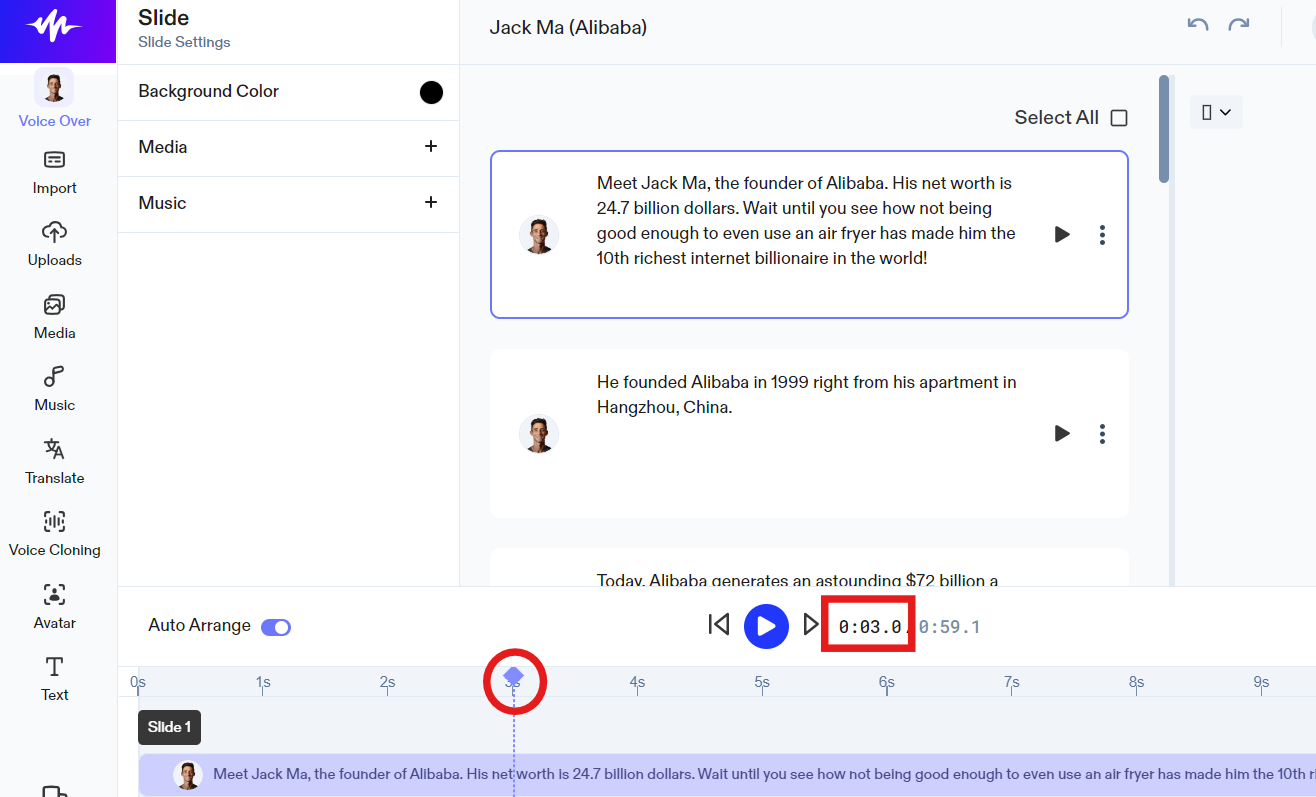
- On a notepad, record the timestamp.
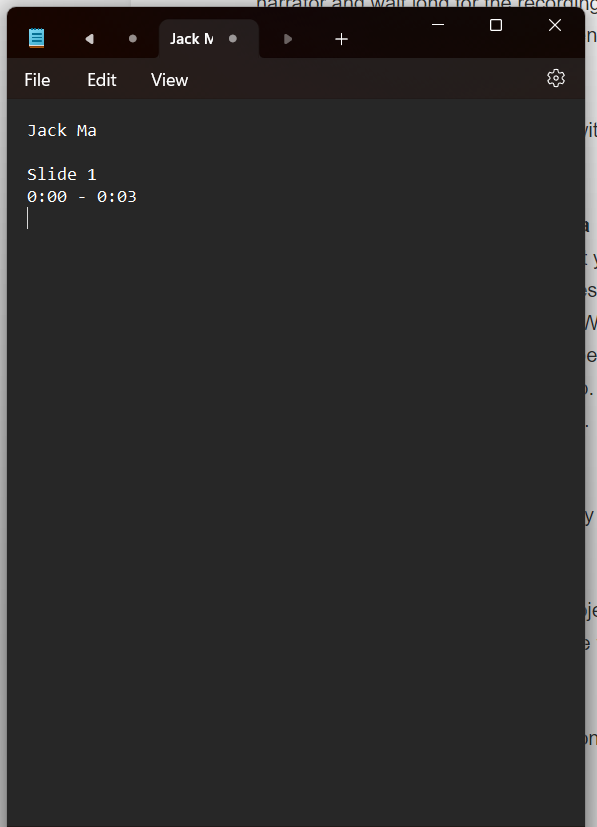
- On Canva Pro, trim the video length. See the image below.
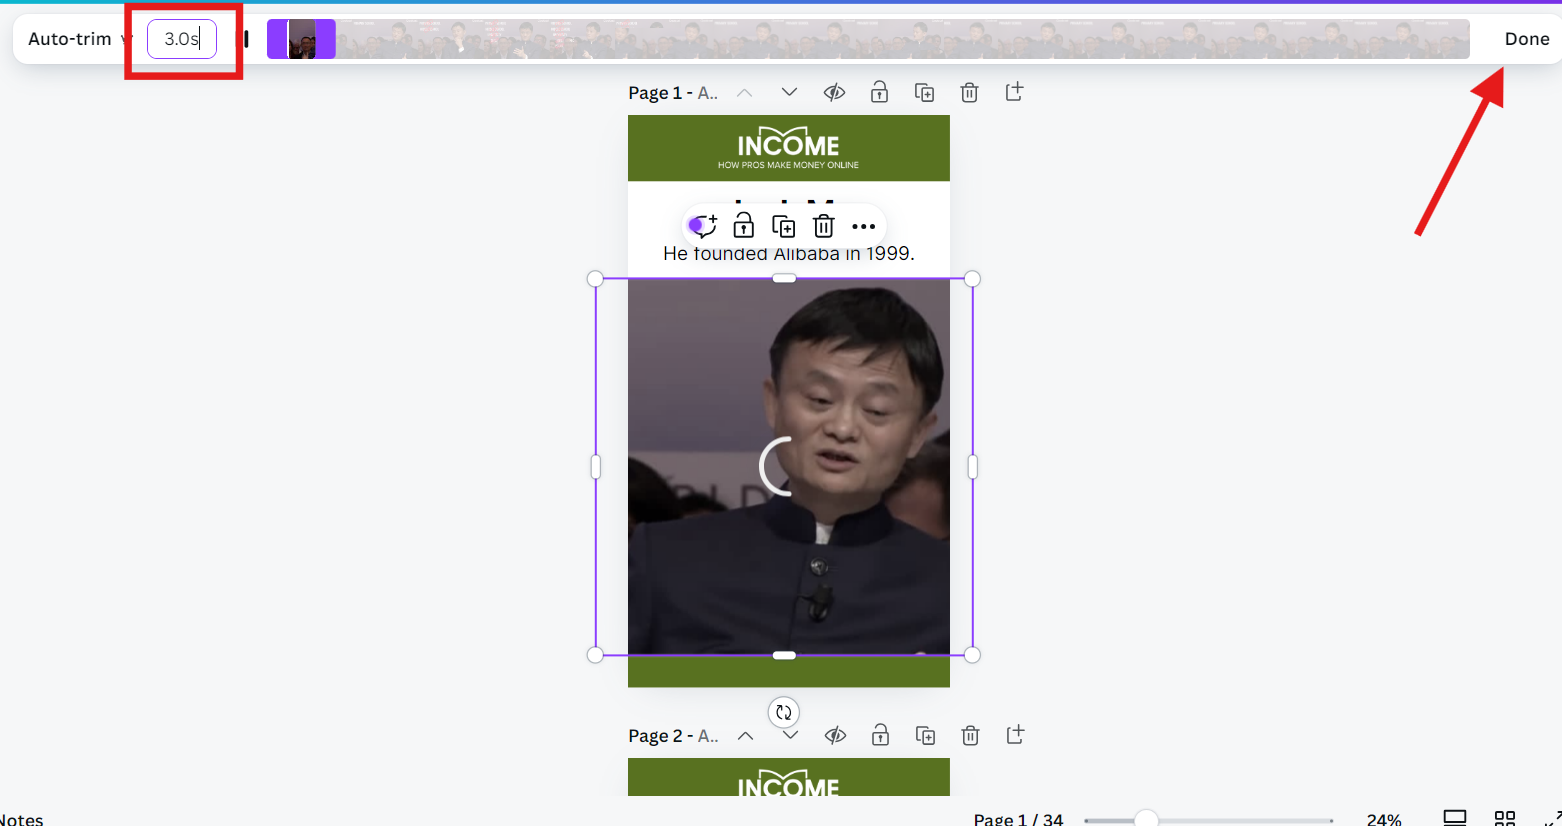
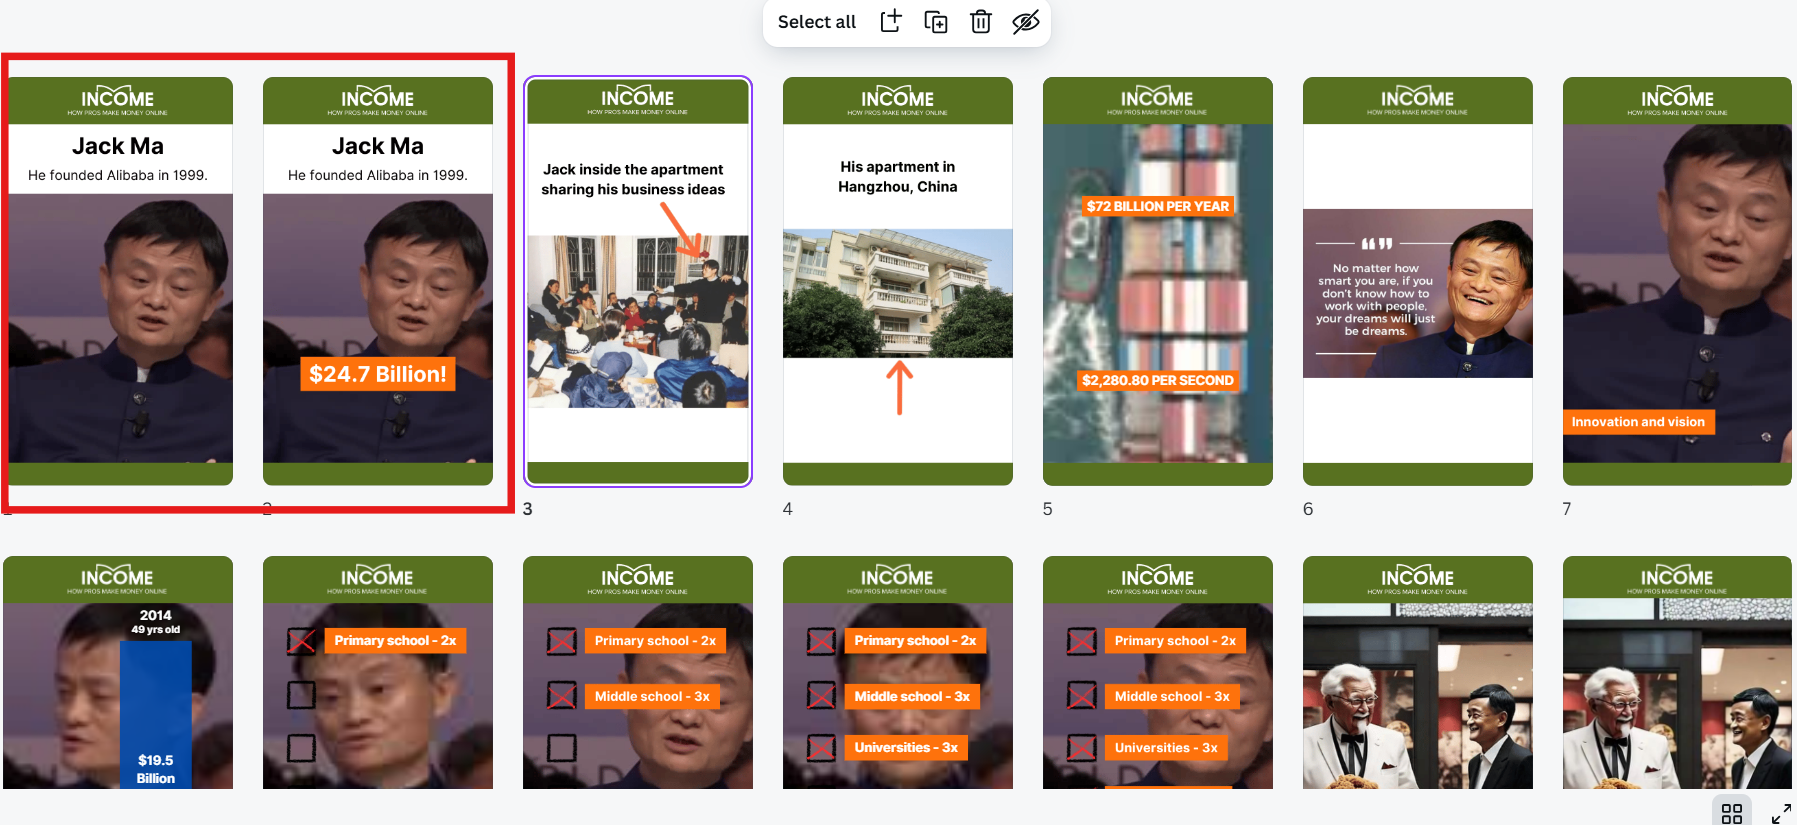
This means that the first slide will run for 3 seconds, and the next slide containing the net worth will start right after it. You can use a calculator to calculate the duration between voiceover scripts. The two images below show that the two slides match the corresponding voiceover block’s duration (0:11:4).
Slides:
Voiceover block:
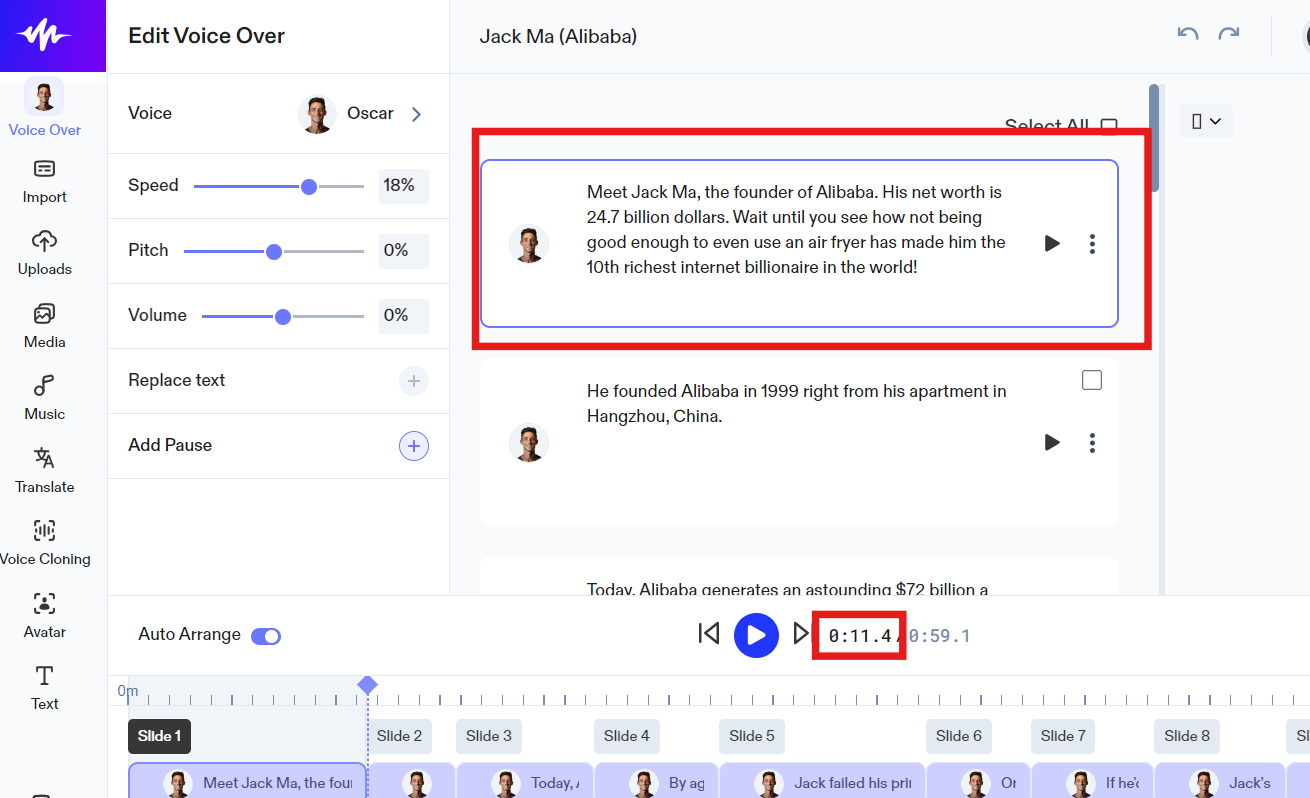
Meaning, the length of the two slides above total to 11 seconds and 4 milliseconds, which perfectly match the length of the voiceover block. Once you have recorded all the timestamps, you can then adjust the length of your slides to match your voiceover scripts.
Step 6: Upload Visuals
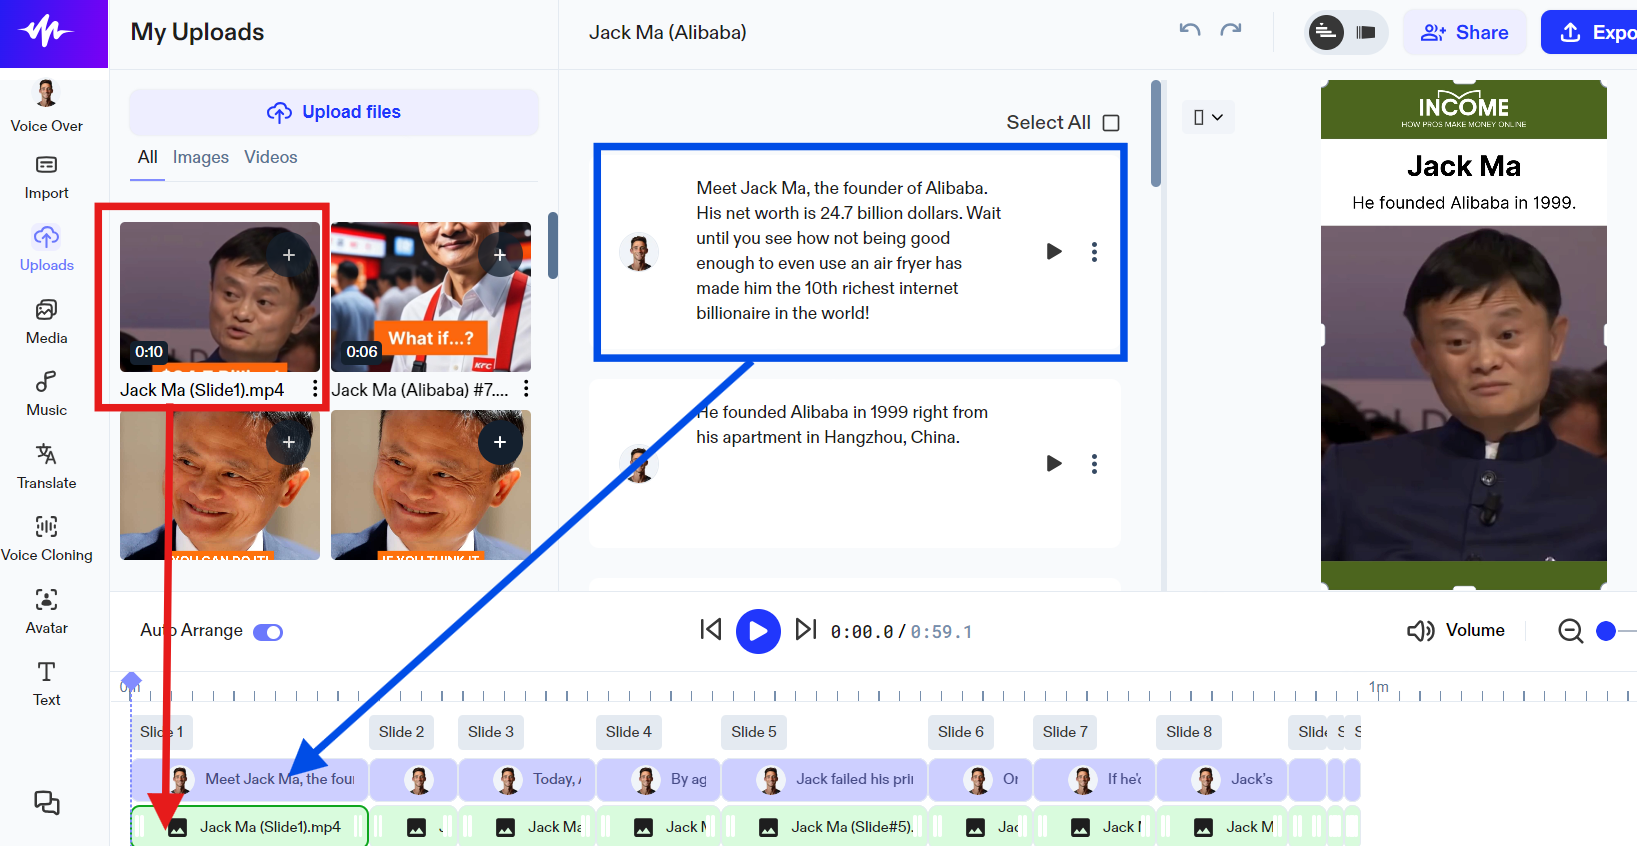
Upload your visuals to Speechify Studio and add them to their corresponding voiceover blocks.
- Click Upload and select the desired files.
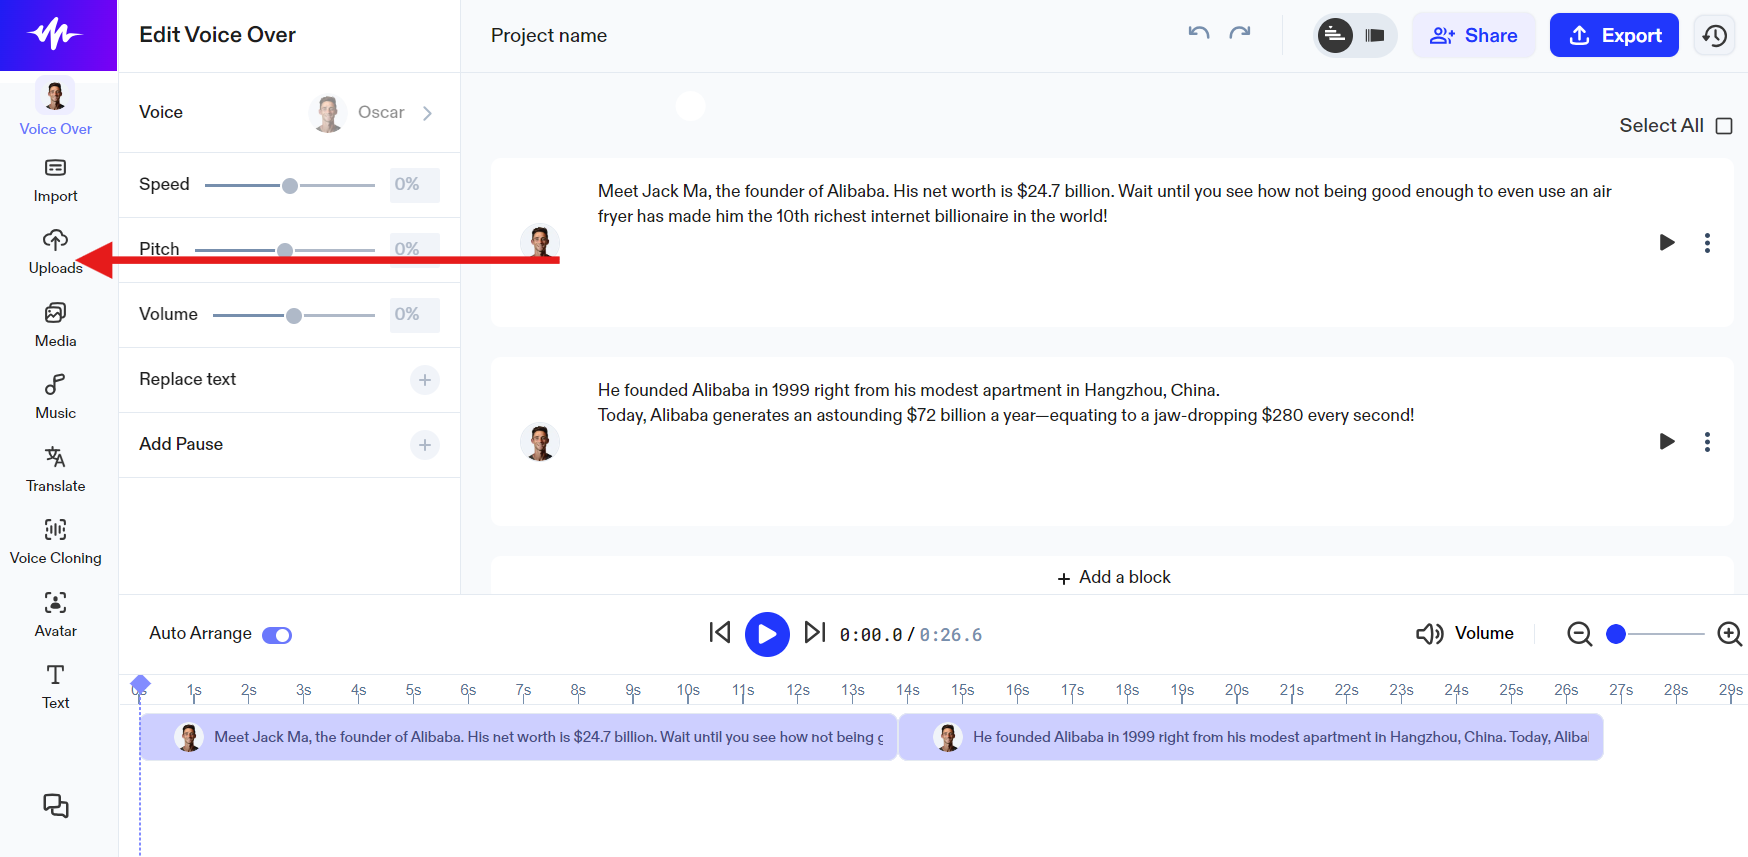
- Once the files have been uploaded, click the + sign on the file (red box), and it will be added to the selected voiceover block (blue box). See the image below.
Step 7: Add Music
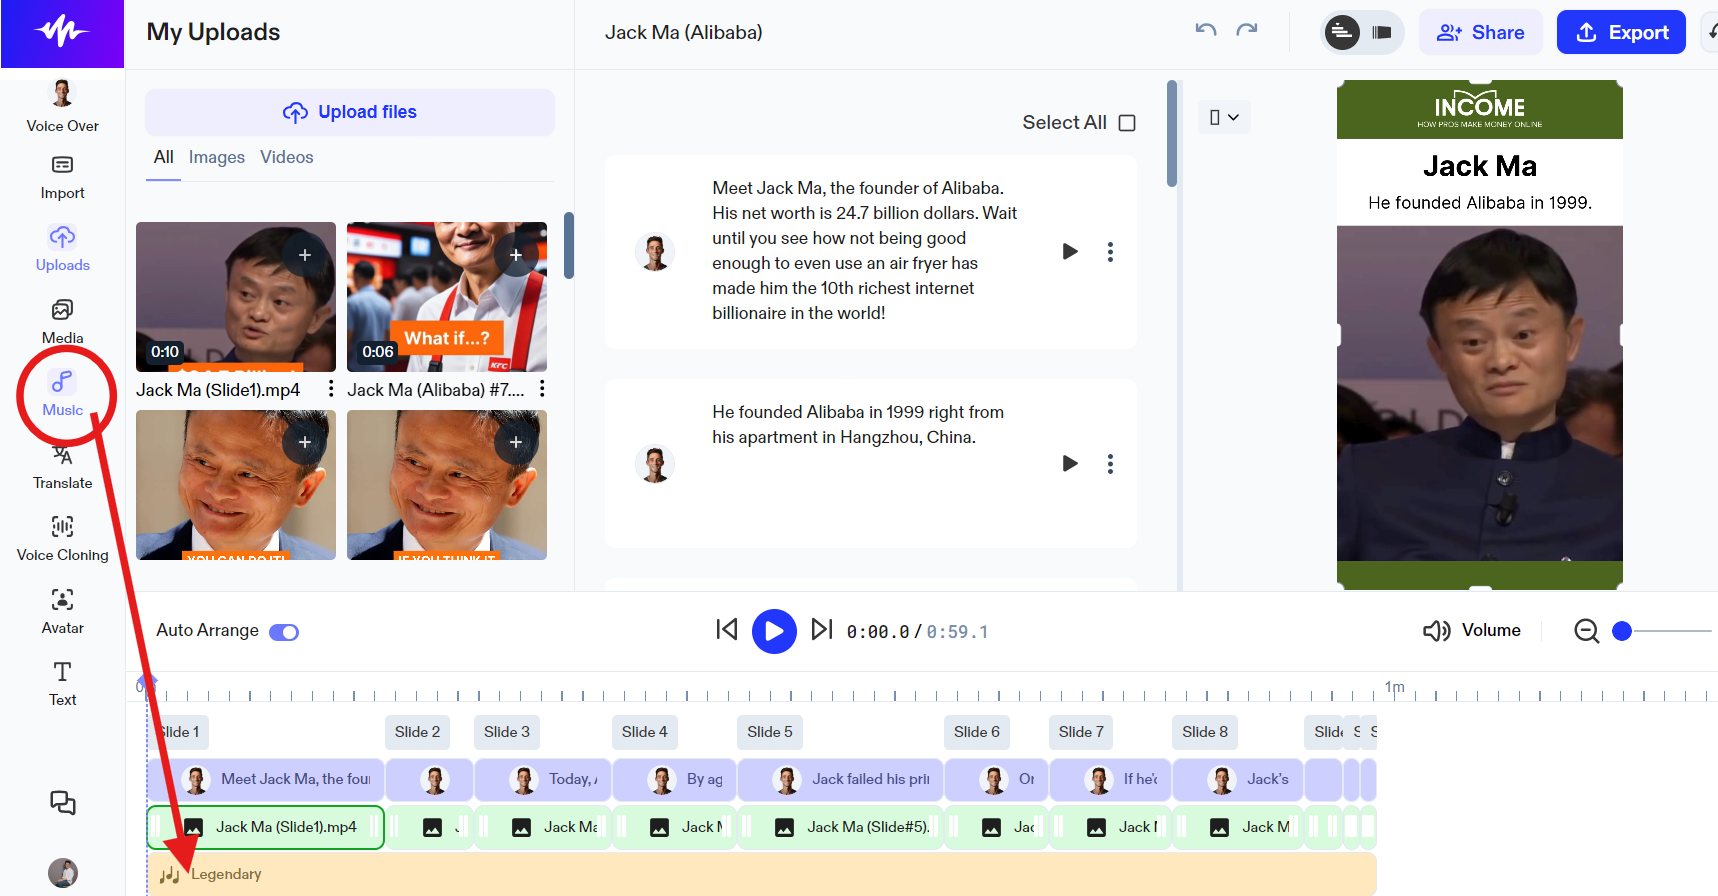
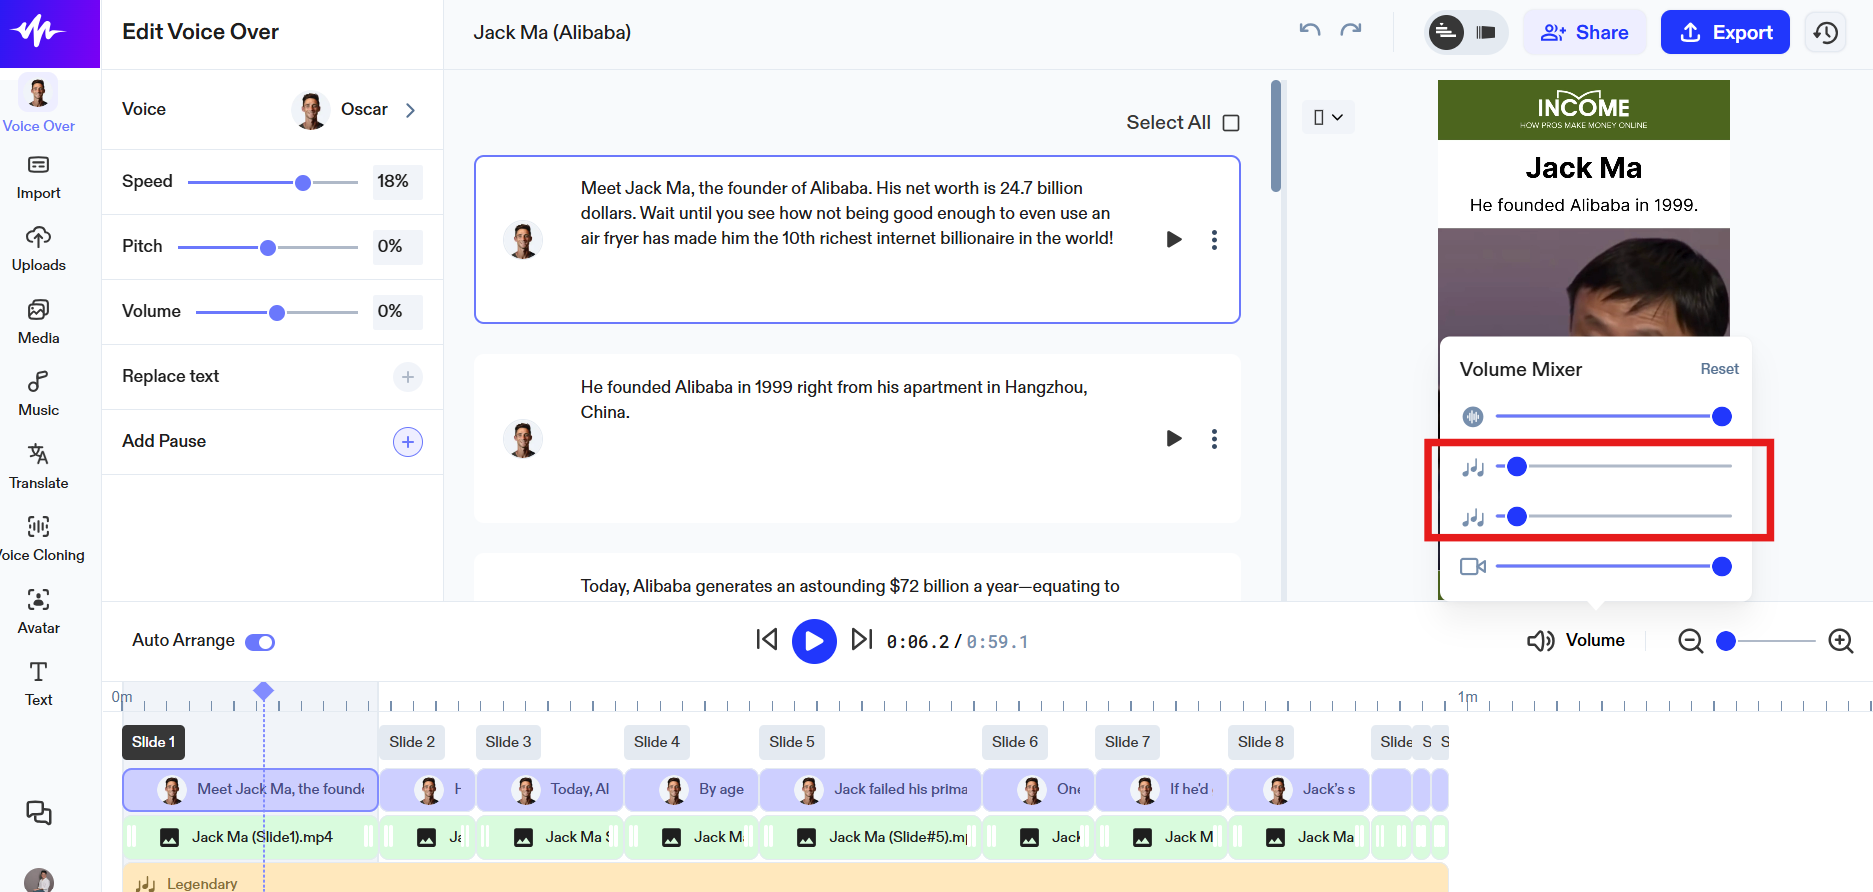
Select background music for your project, keeping it at the lowest volume level. You want the music to enhance the video, not overpower the voiceover.
- Click Music and select one from hundreds of royalty-free sounds that best suits your theme or topic.
- Click Volume.
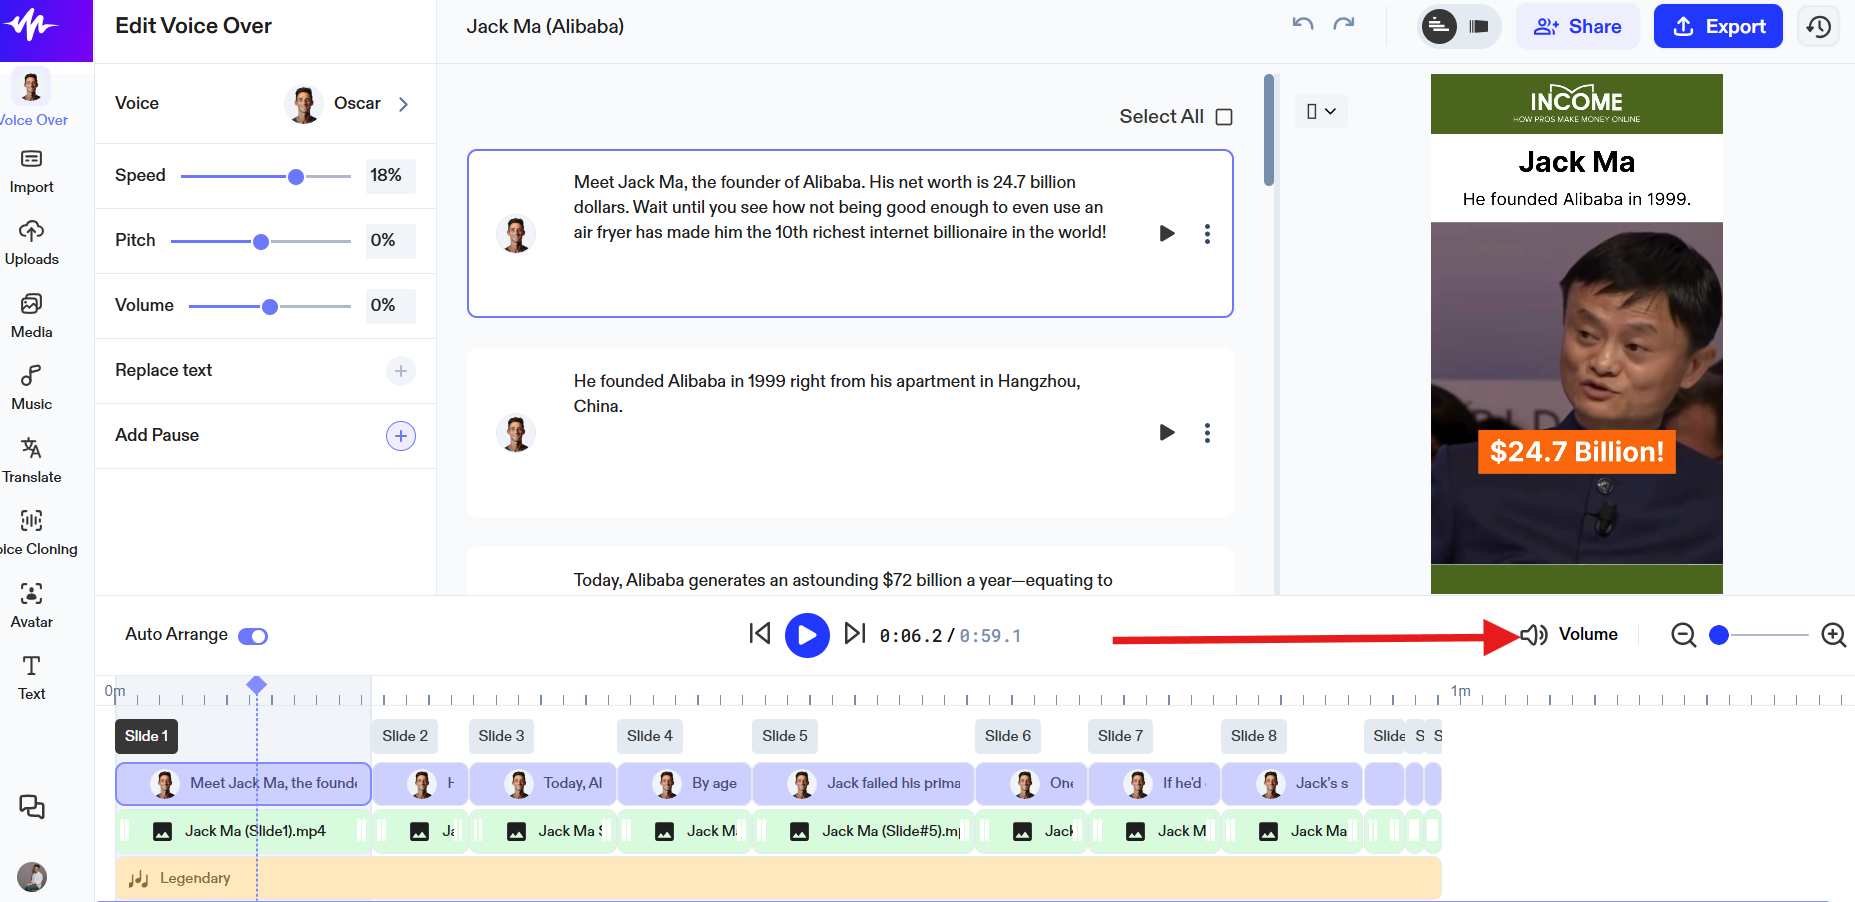
- Set the two middle lines at the lowest level.
Step 8: Set Portrait Resolution
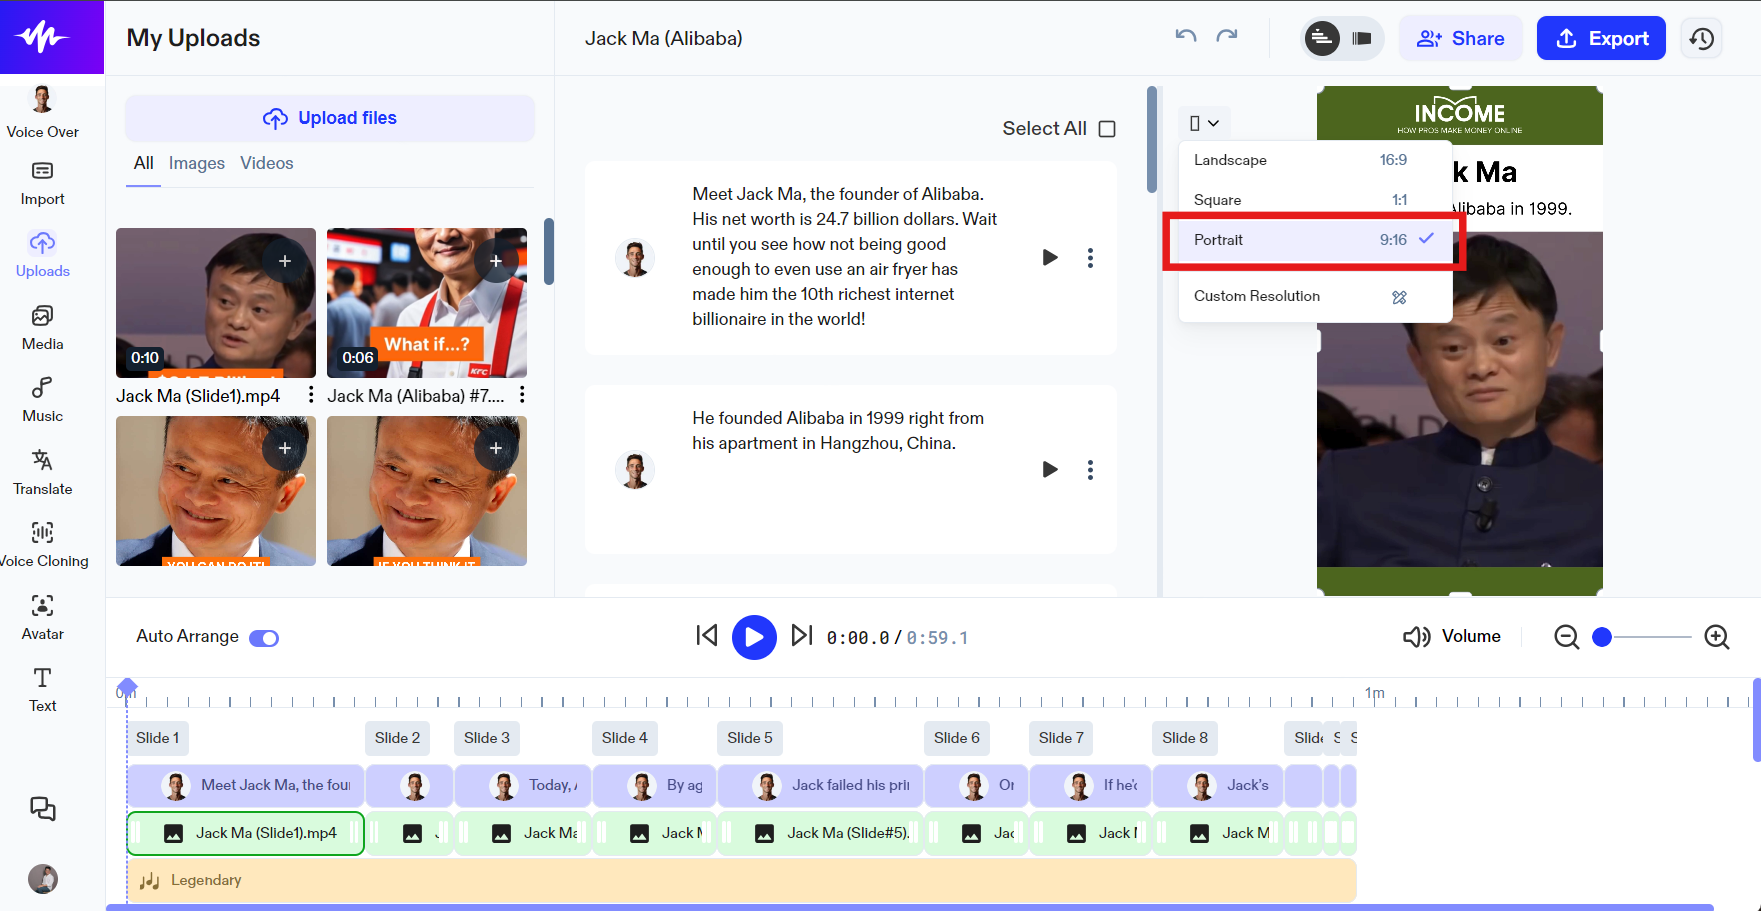
Remember to set your video resolution to portrait (9:16) for optimal viewing on mobile devices. See the images below.
- Click the dropdown icon.
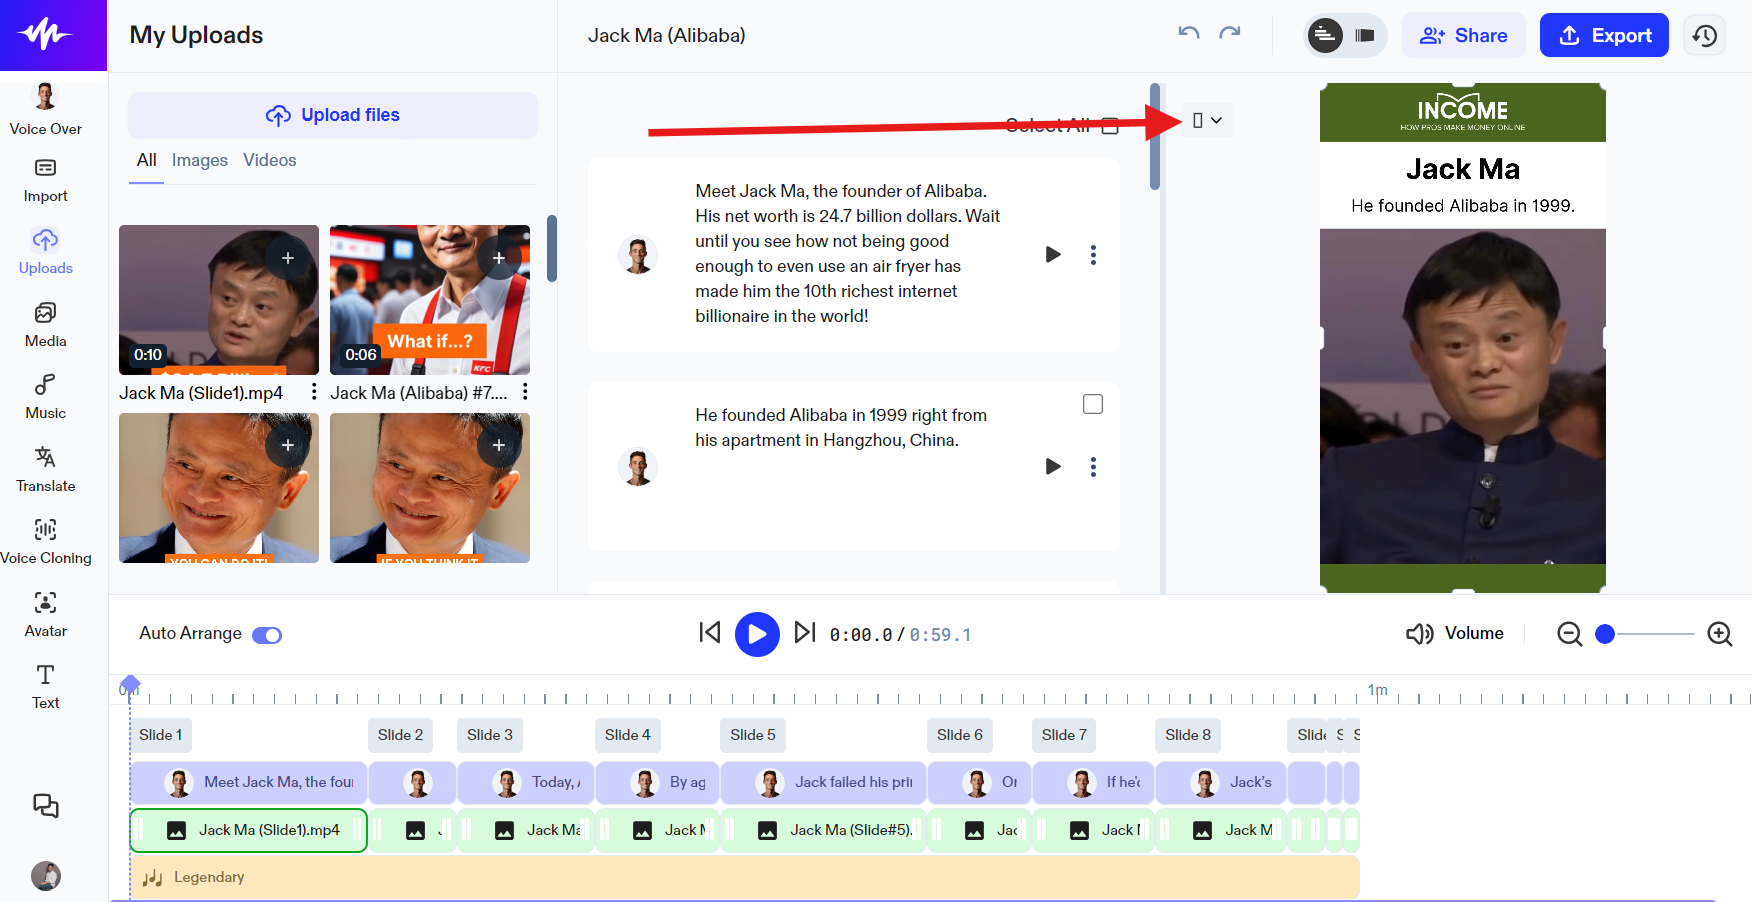
- Select Portrait.
Step 9: Export & Download
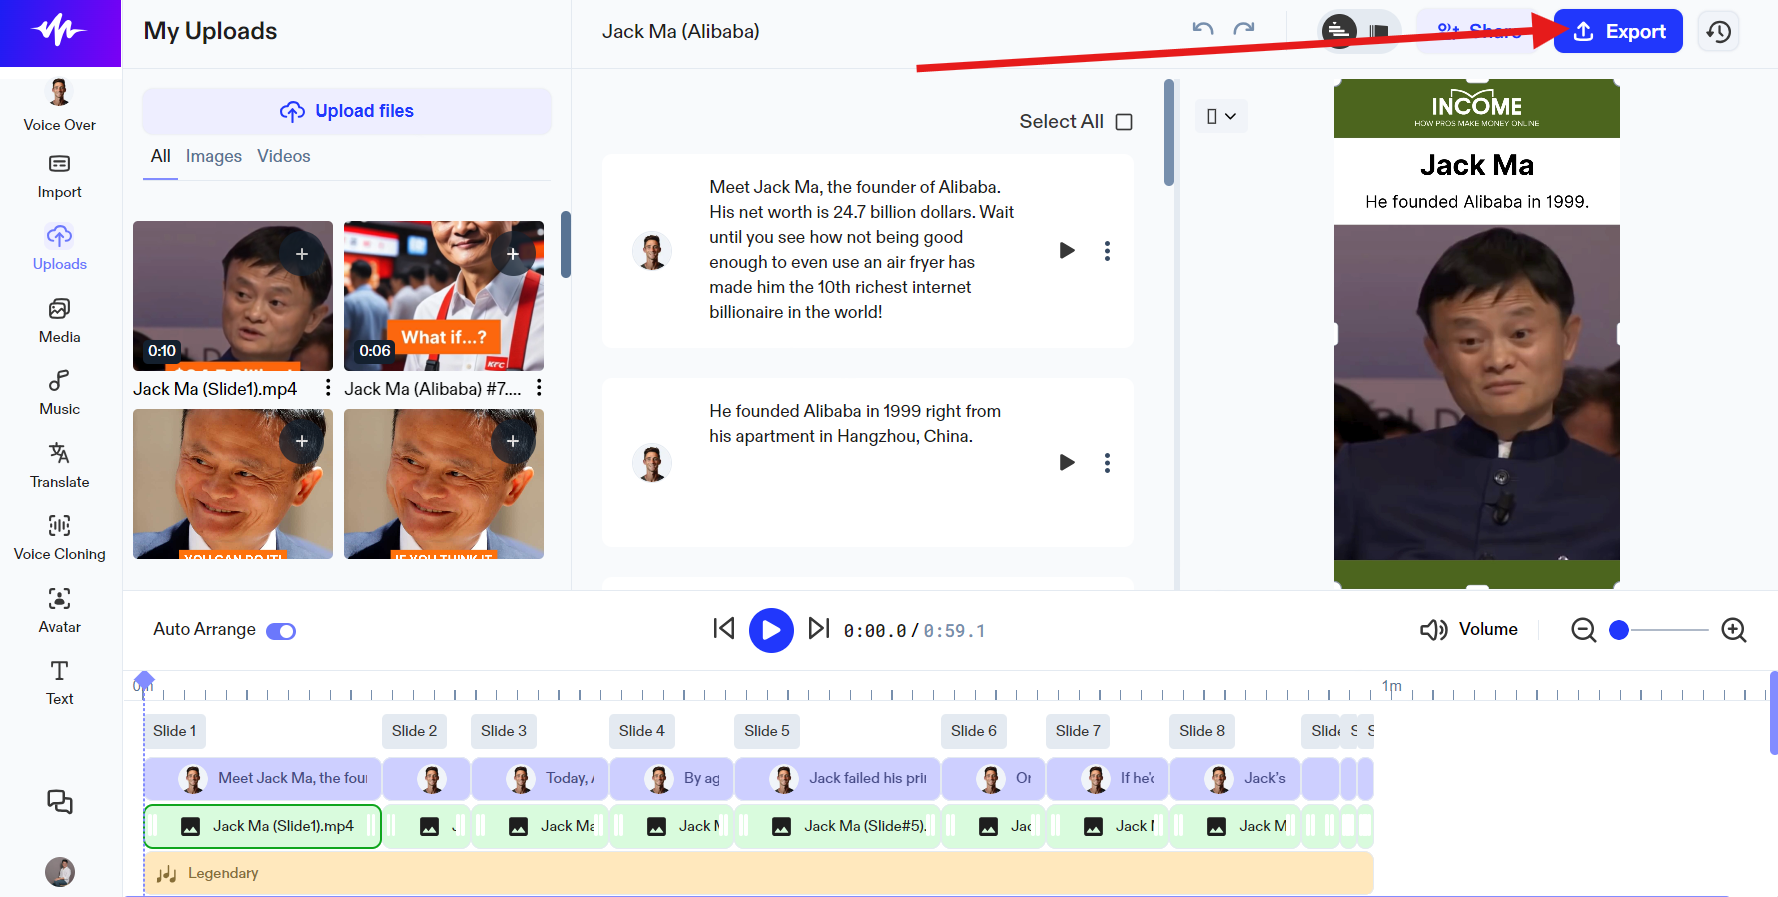
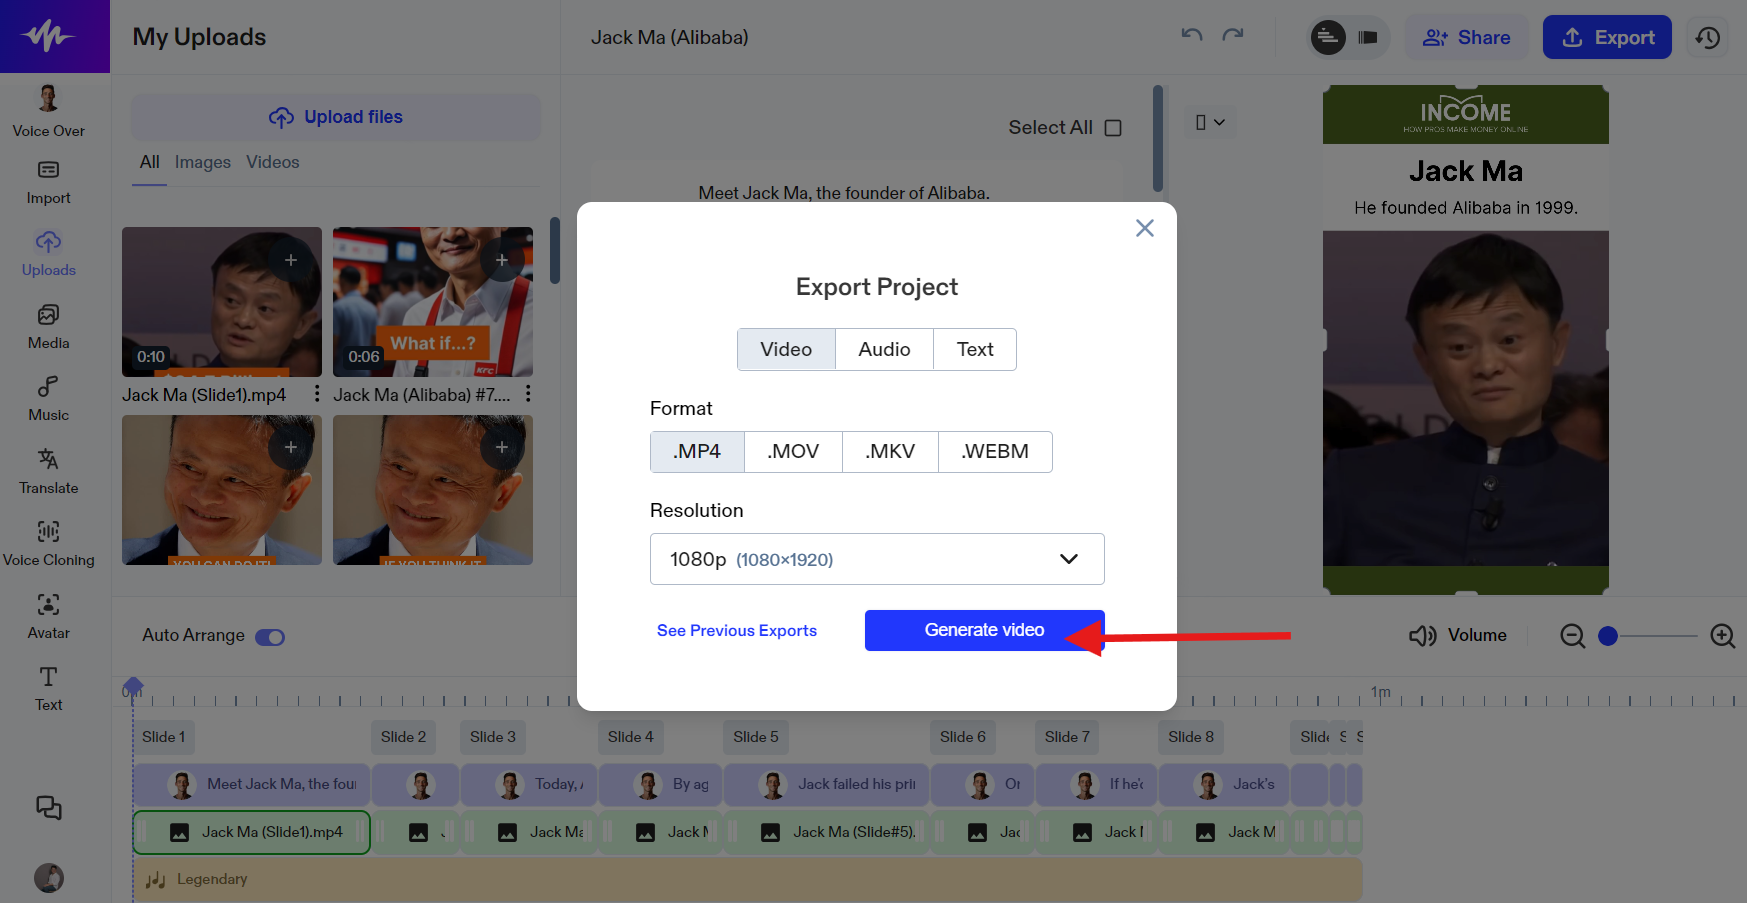
Finally, export your project and download it.
- Click Export.
- Click Generate video.
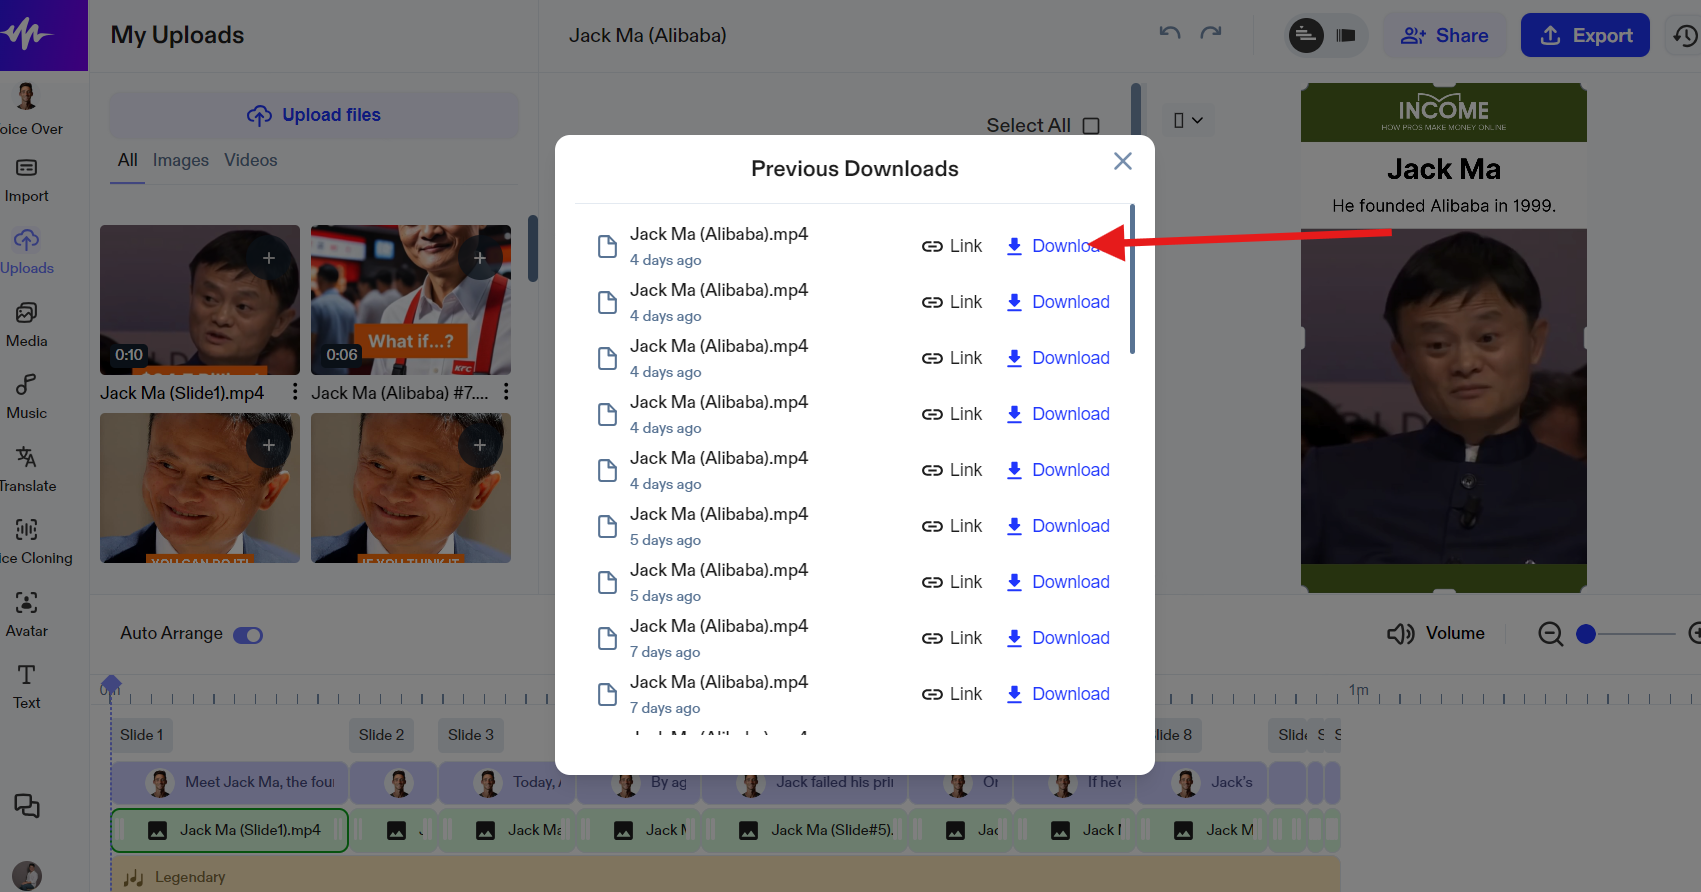
- Click Download.
Now you’re all set to share your engaging short video with the world!
How to Upload Your Video to YouTube
Here the steps and tips to upload your videos to YouTube as shorts.
Step 1: Video Must Be Below 60 Seconds
You want to ensure the video is 59.9 seconds at the most. For some reason, YouTube always adds an extra second to your video. For instance, if you upload a 60-second video, it will end up as a 61-second video, and YouTube will treat it as a long video.
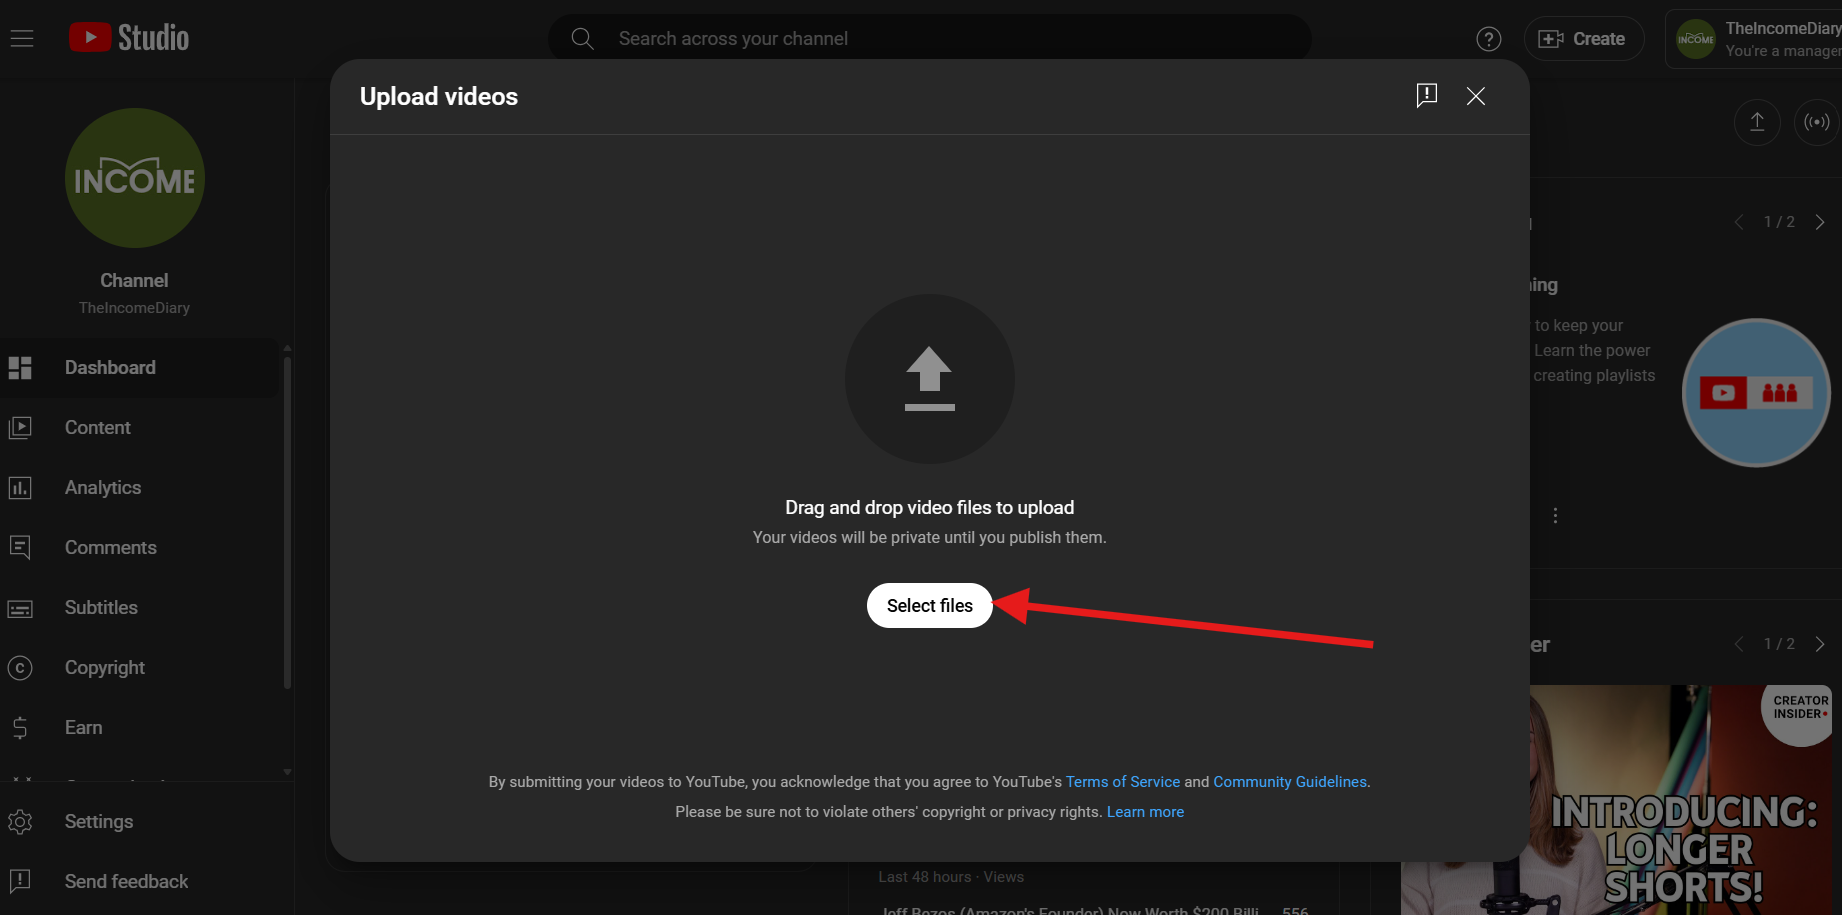
Step 2: Upload Via YouTube Studio
YouTube Studio is a special in-app tool designed to help creators create, manage their content, and analyze their performance on their YouTube channels.
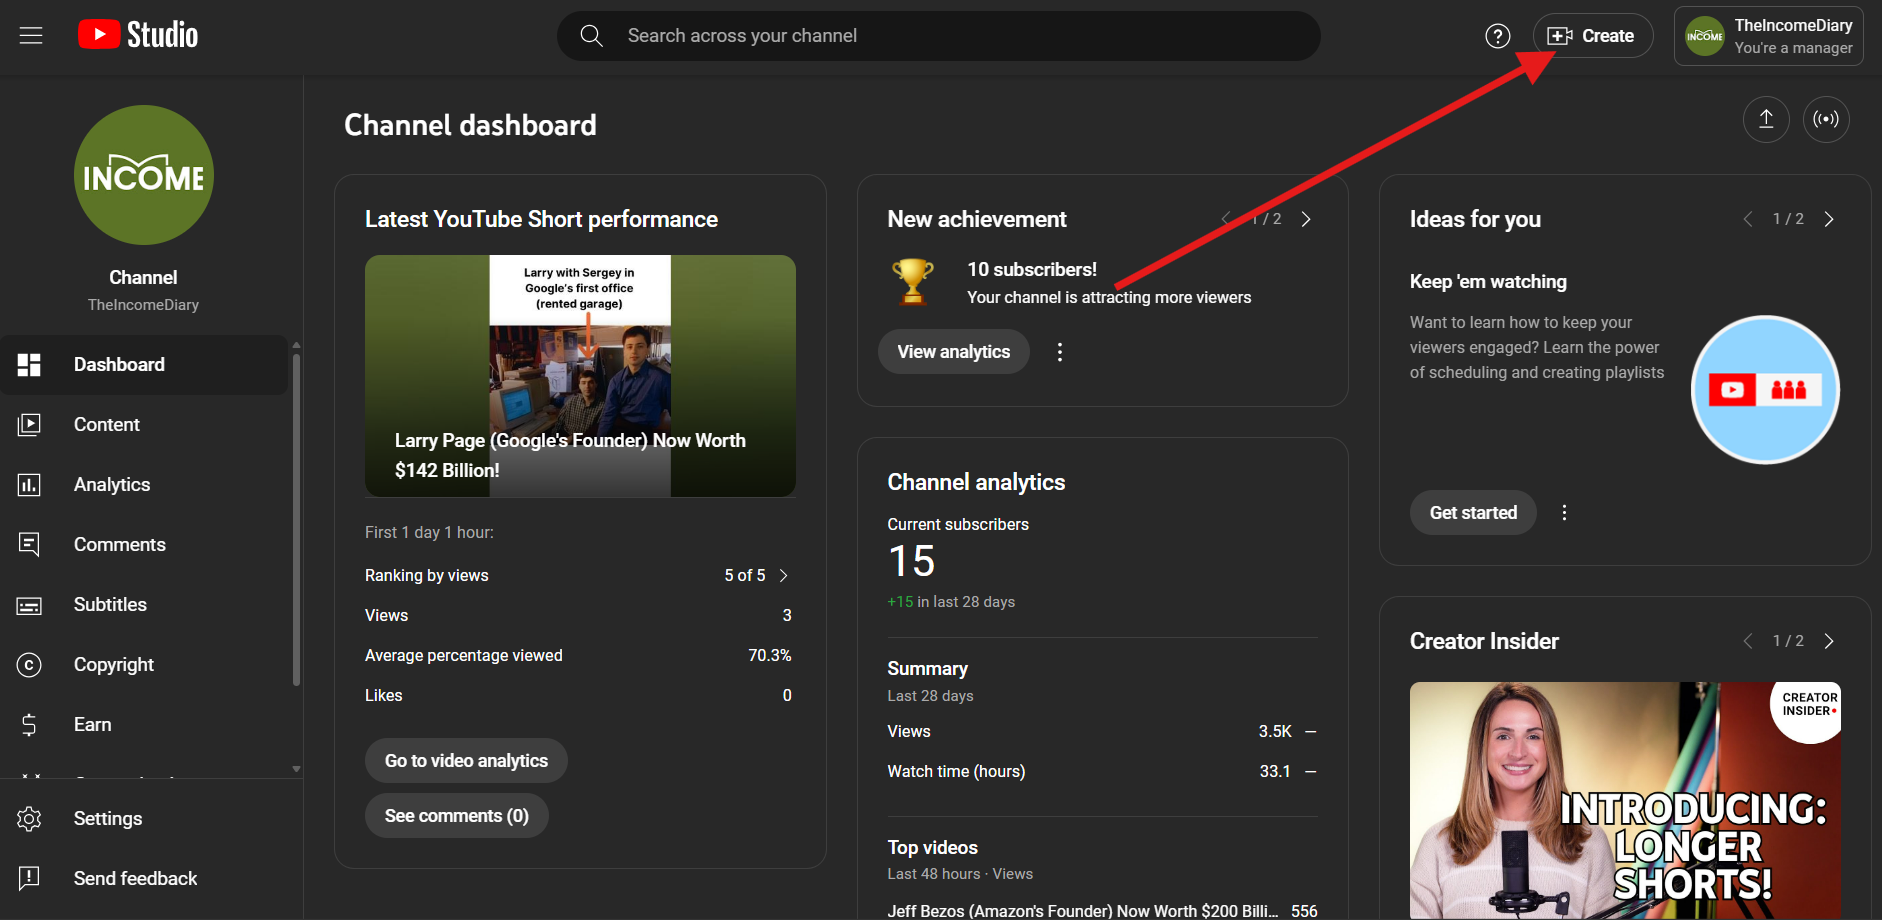
- Go to YouTube Studio.
- Click Create.
- Click Upload videos.
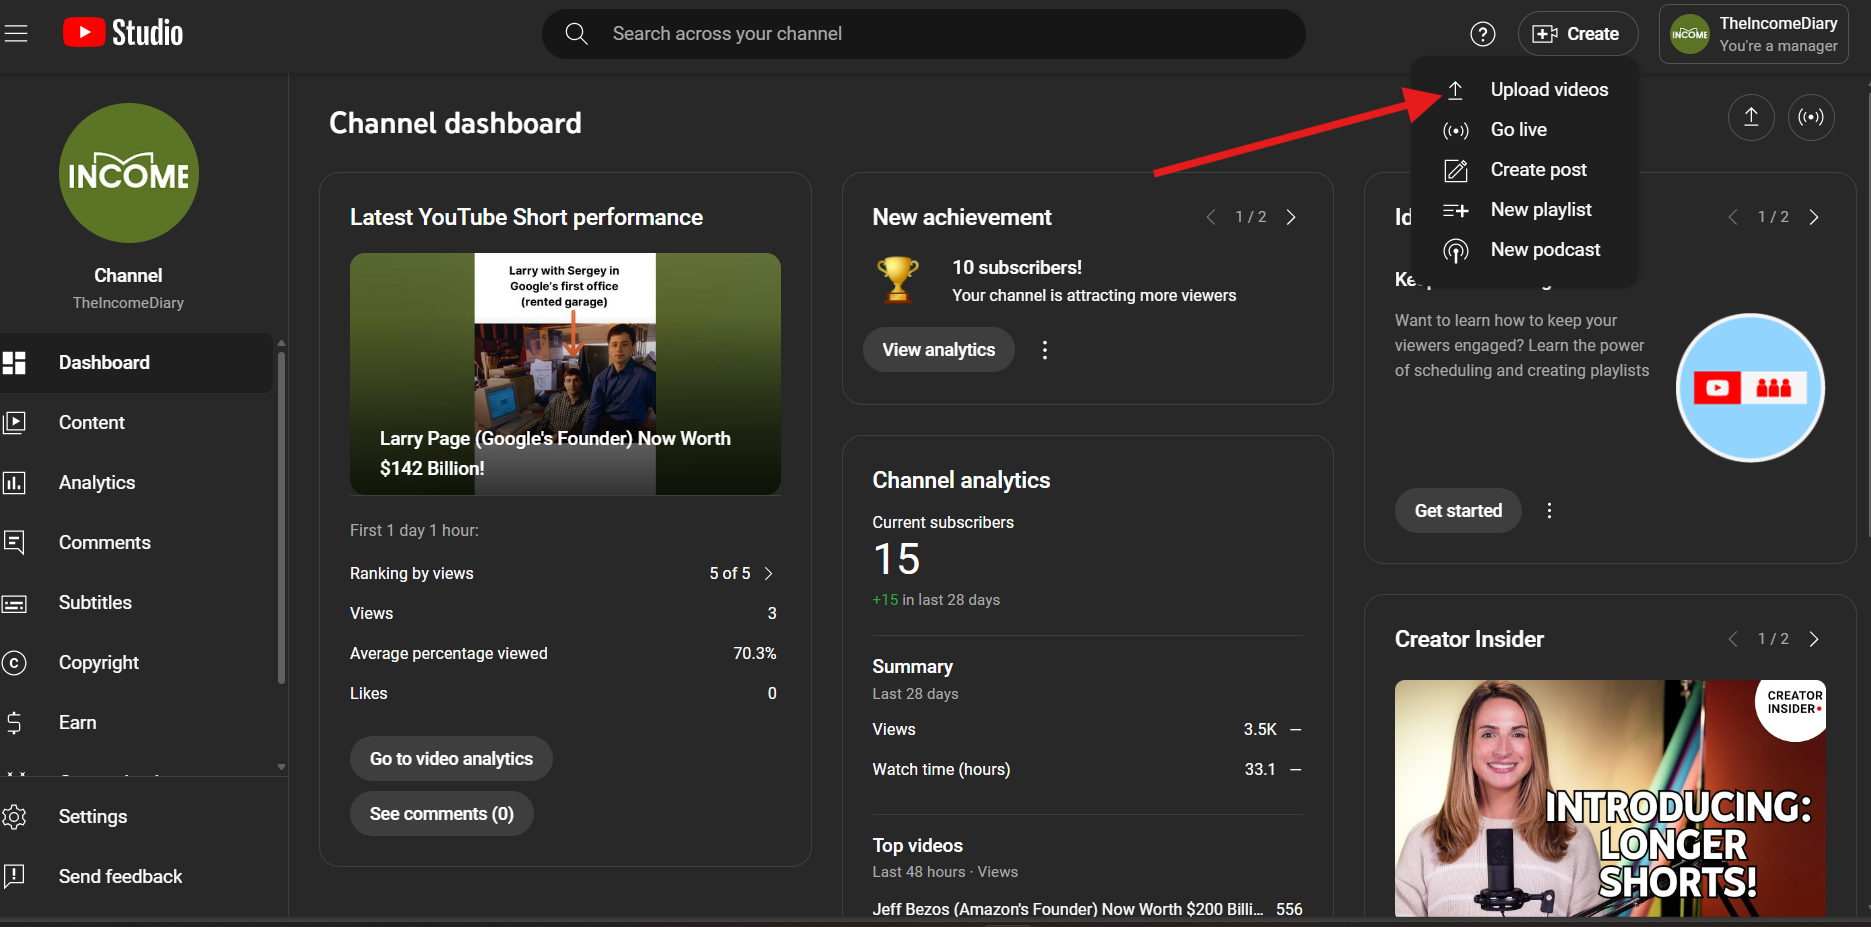
- Click Select files and choose the video you want to upload.
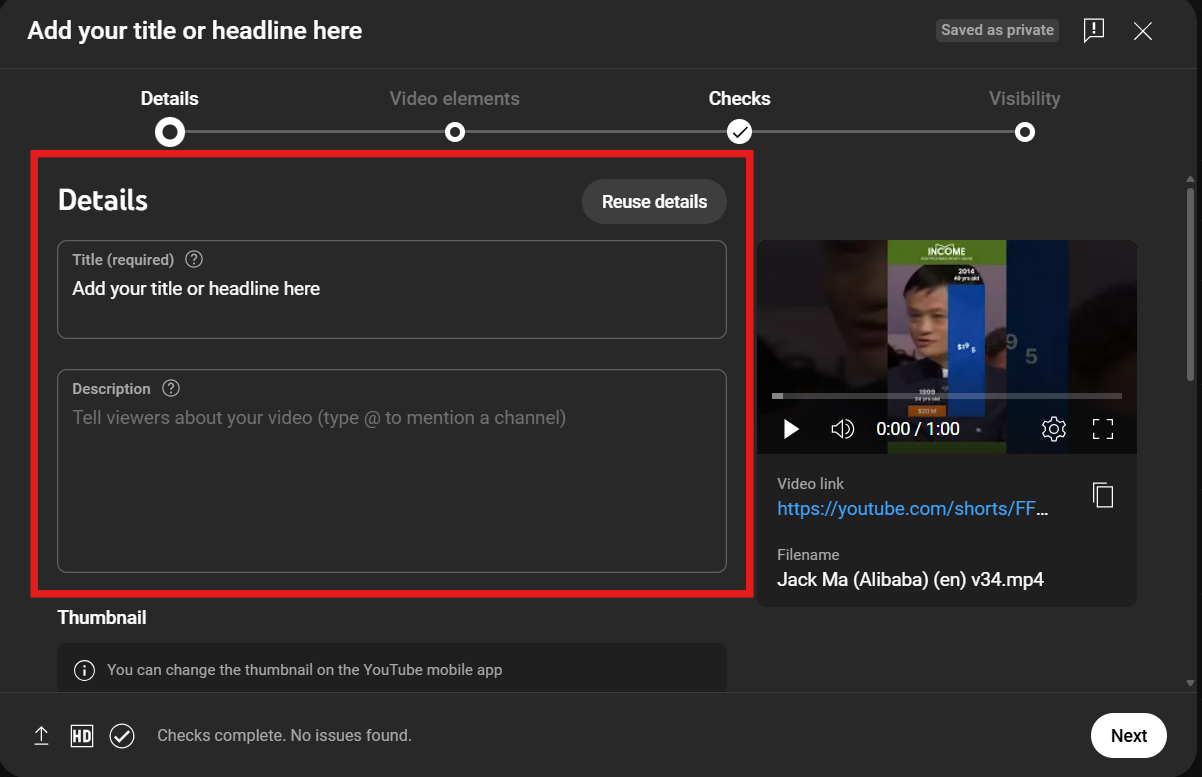
Step 3: Add Details
Add a catchy title or headline and a description that best describes your video. Use hashtags and choose keywords related to your video, so it will appear when people search videos using these keywords.
Step 4: Correct Settings Matter!
Ticking and unticking these boxes correctly will help you get more views.
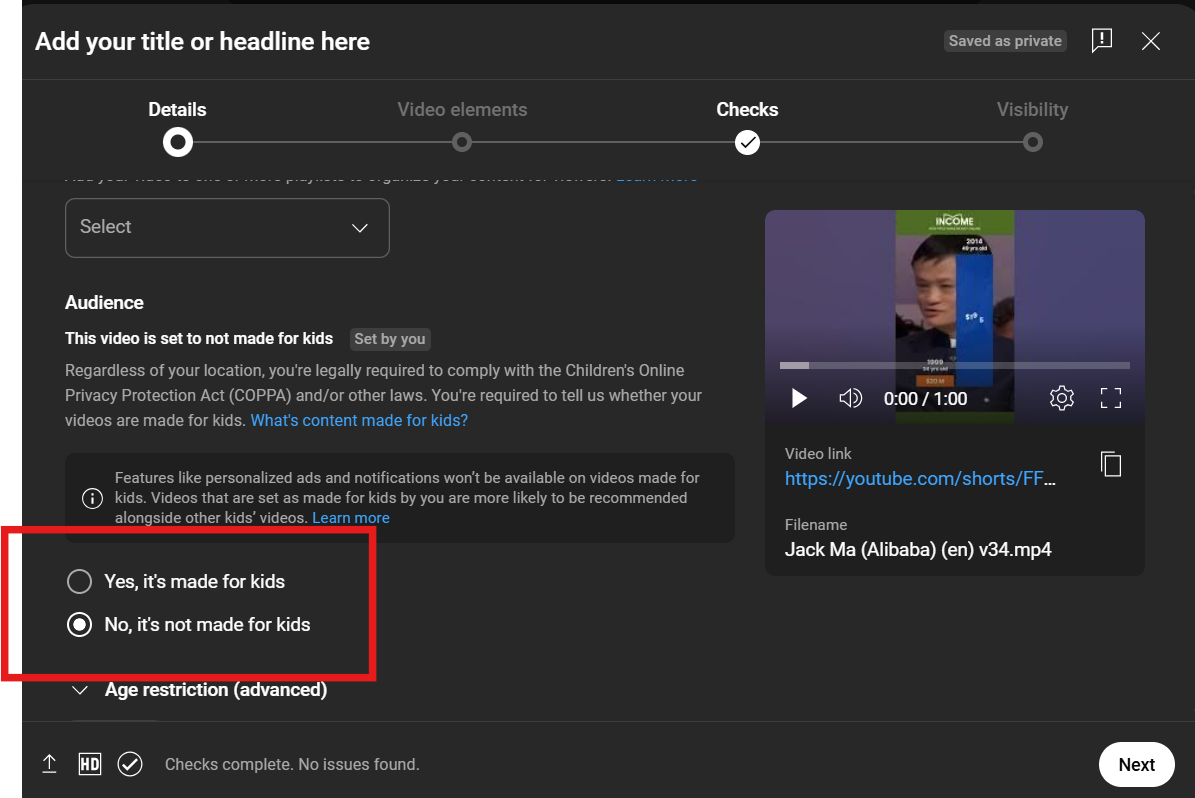
Audience
- Choose “No, it’s not made for kids” unless your content is specifically made for kids. Choosing the other option will narrow down your audience and reach.
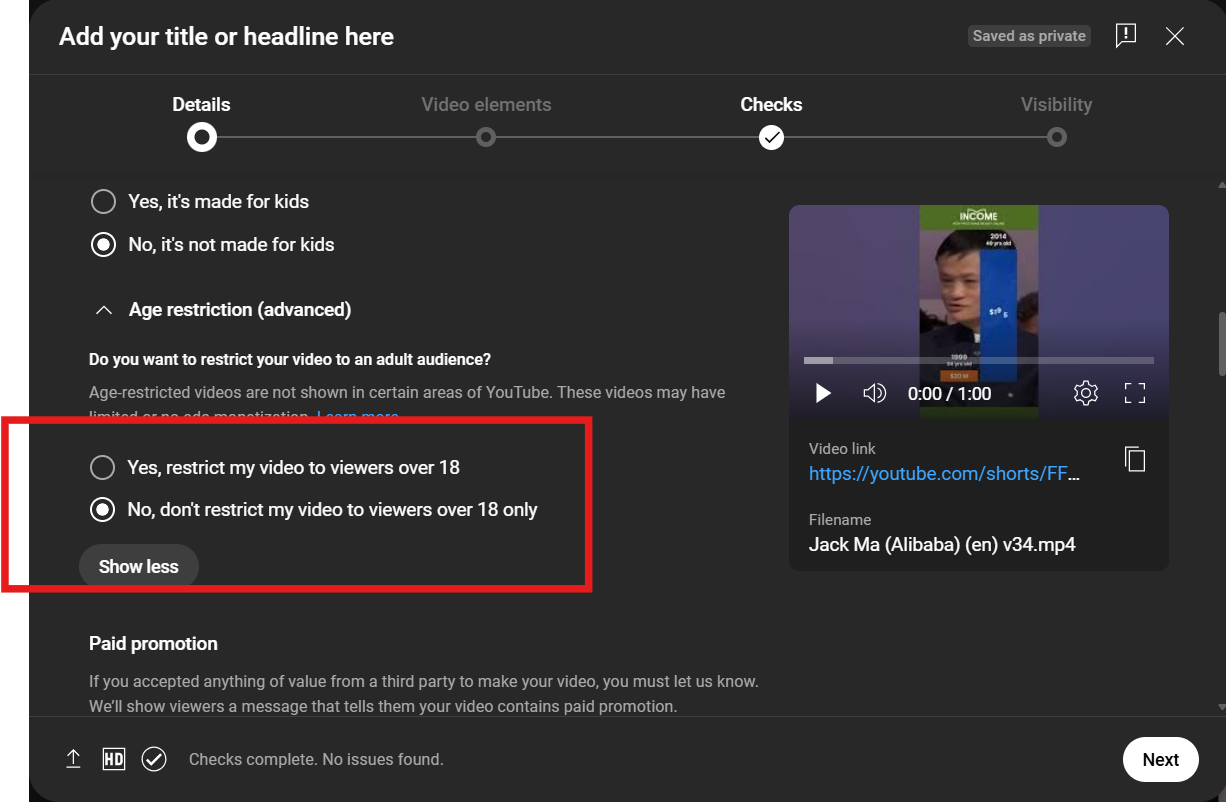
- Click “No, don’t restrict my video to viewers over 18 only.” This option widens your audience and reach.
License
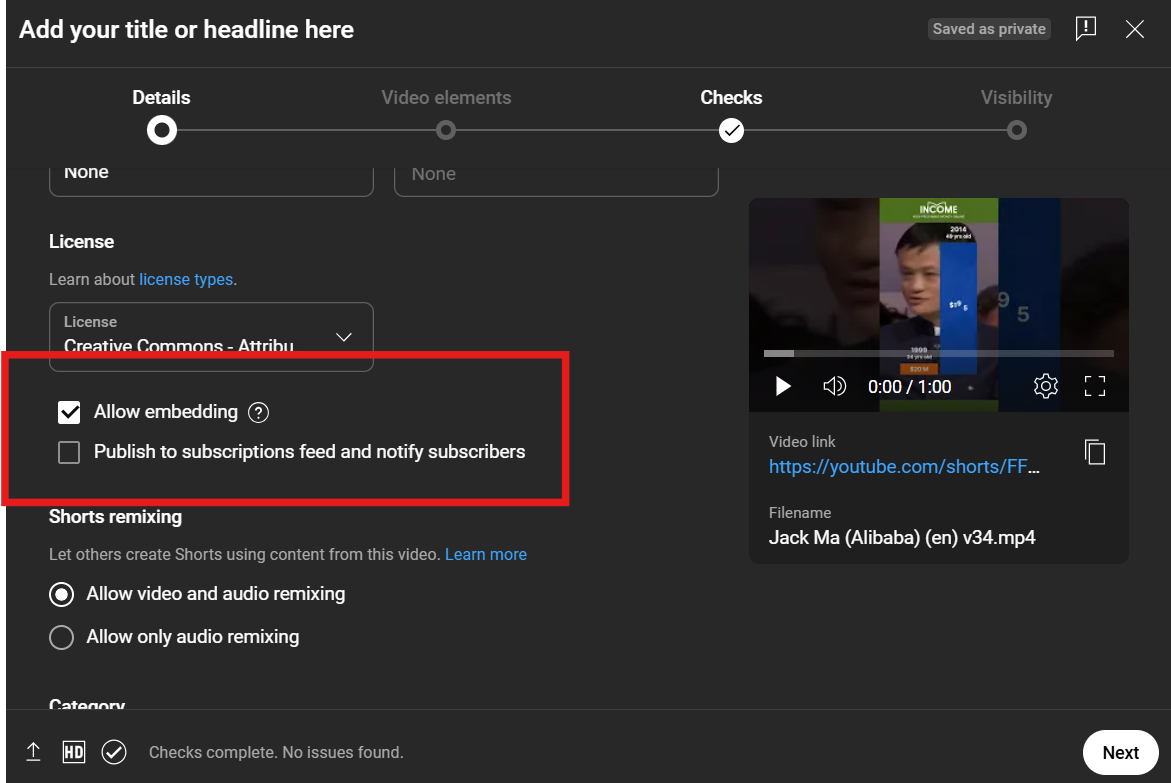
- Keep “Allow embedding” ticked to allow you to embed the video into your website and other sites.
- Never tick “Publish to subscriptions feed and notify subscribers” if you’ve just started your channel and have a few subscribers because the algorithm will only suggest it to your subscribers. It basically limits your audience and reach.
The rest of the boxes are optional.
Video Elements
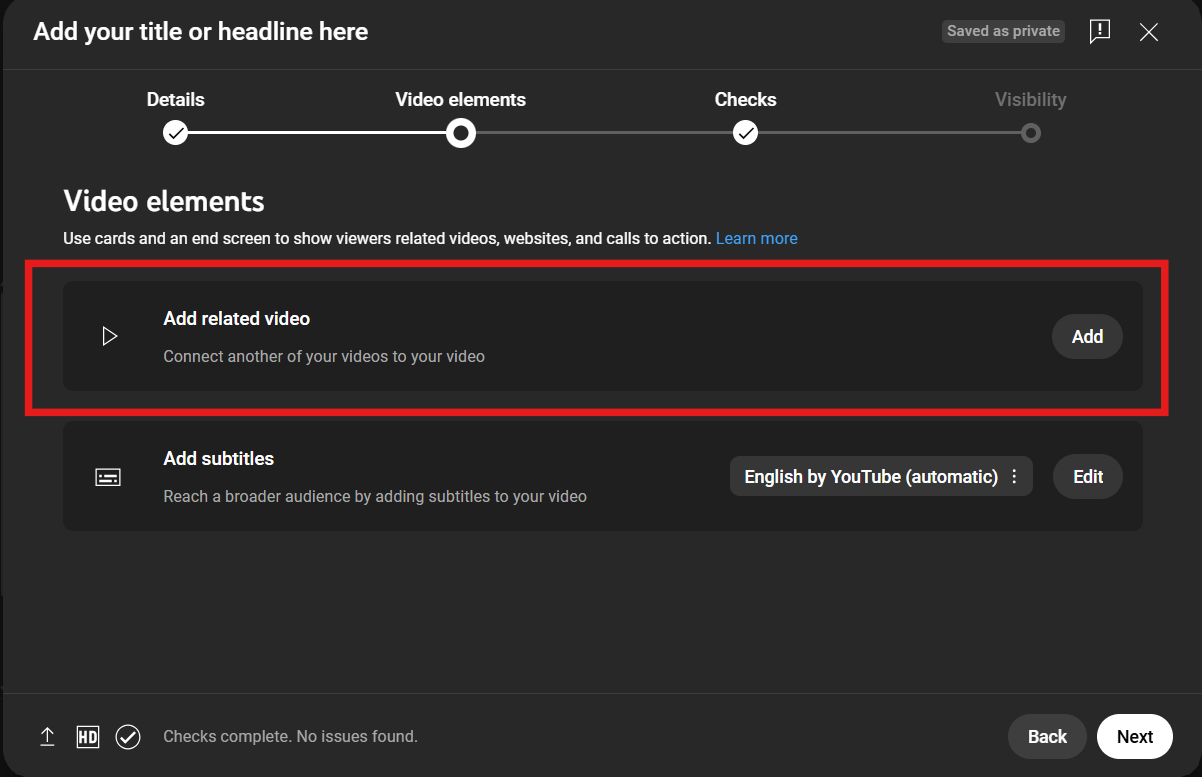
Once you’ve finalized the details, click Next to move to the next setting, which is video elements. Under this tab, you can link the video to the other available videos on your channel.
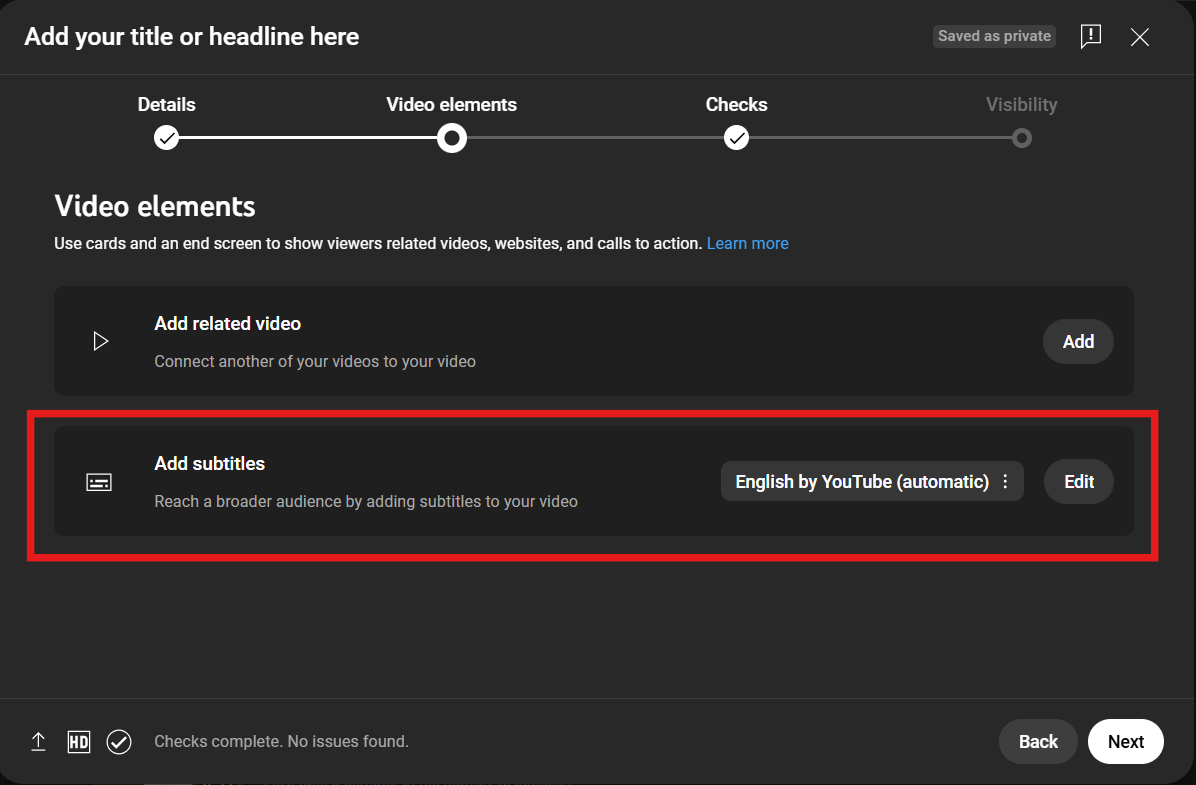
You can also add subtitles to the video. There are three options: you can upload a file, let YouTube automatically do it for you with their auto-caption, or you can manually type them.
Once you’re satisfied with the video elements, the next tab to focus on is the last one.
Visibility
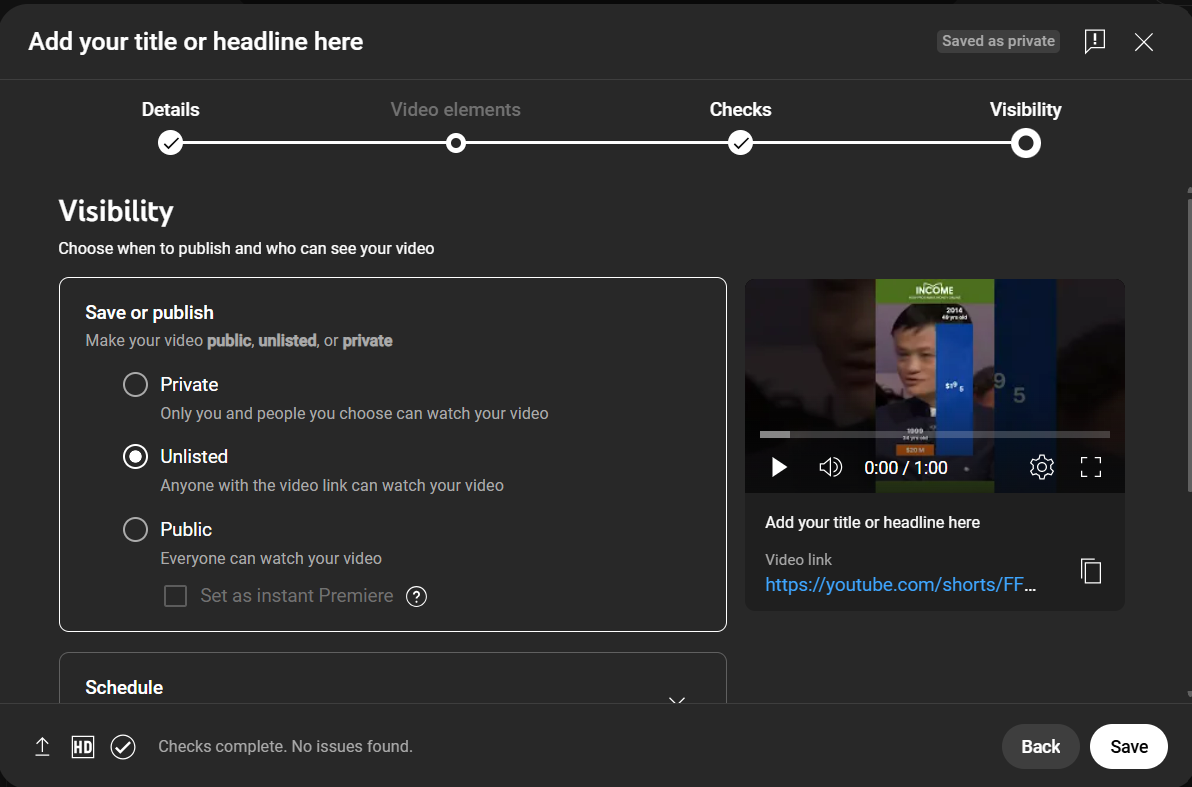
Under this tab, you can choose how you want to publish your video. See the three radio buttons in the image below for description.
Click Save and voila, you’re done!
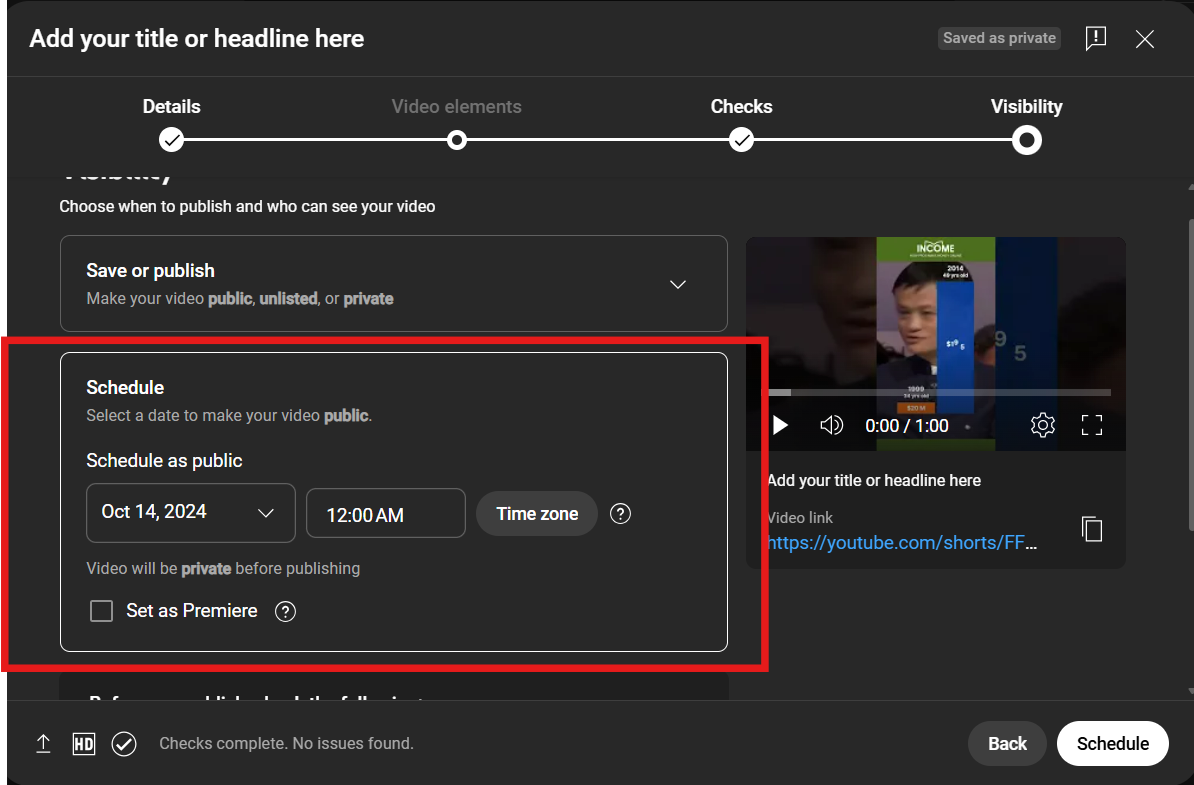
You can also schedule your video. This option is really powerful and saves you a lot of time. With this, you can plan ahead, put your videos in a queue, and edit them before they even get published. Click Schedule, and you’re set!
And that’s it! You’re ready to create captivating videos. What topic will you choose for your first project?
The post How To Create Short Videos For YouTube, Instagram and Tiktok appeared first on How To Make Money Online.
See TessMore Internet Business Must-Reads ||How To Make Money Online https://ift.tt/oLZ0wRz
Comments
Post a Comment