Learning how to change your WordPress theme seems like a very basic thing. Simply go to Appearance > Themes, hover over any of the available WordPress themes, and click Activate, right?
While that is correct in principle and works well for a site that is basically empty, it gets a bit more complicated for an established website with a lot of content. In that case, it becomes more of a case of how to change your WordPress theme safely and without losing anything. And that’s exactly what will talk about here.
In the following, you will learn what risks there are to changing your WordPress theme. We will talk about how to prepare for the switch, different ways of performing it, and how to check your site after you are done.
Changing Your WordPress Theme: Potential Risks
Before going over the how-to part, let’s first discuss why you need to be cautious when changing your WordPress theme and what things can break.
First of all, you can generally relax. WordPress is built in a way that the majority of what is on your site will not be affected by a theme change. That includes:
- Your post and page content
- Core WordPress settings such as whether you are using a static homepage or your site name and description
- The URL structure and addresses of your pages and posts
- Which plugins are installed and active on your website
All of the above are independent of the theme. For some of it, the design might change but it will otherwise be the same. However, there are a few parts of your website that might be affected by a theme change, such as:
- Theme-specific widgets, settings, functionality (e.g. breadcrumbs), plugins, and shortcodes
- Widget content, especially if the widget area no longer exists in the new theme
- Images, especially those formatted in theme-specific sizes
- Some plugin functionality might prove incompatible with your new theme
- If you are using a page builder plugin (or if your theme comes with one), its customizations likely won’t work the same way with your new theme
In short, the more complex and customized your existing theme, the more there is to break when you switch. Generally, however, the majority of your website should weather a theme change without problems. The rest is simply being aware and checking before making your changes live.
How to Prepare for a Theme Switch
In order to make sure everything goes as planned, you first need to take a few steps so that you can go through the process with no regrets. Follow the steps below to ensure that nothing important gets lost when moving from one WordPress theme to another.
1. Copy Your Current Theme’s Code Snippets
It’s a common practice to introduce theme customizations and new functionality via the theme’s functions.php. This can be anything from custom fonts, over-creating new widget areas, to adding your Google Analytics tracking code.
The downside of that is that these changes are theme specific. When you start using another WordPress theme, the customization will go away. Especially for the tracking code example, that is a big problem.
For that reason, as a precaution before changing your WordPress theme, open your current theme’s functions file and copy all custom code snippets over to a code editor.
2. Speed Test Your Website
A valid reason to switch WordPress themes is if the old template doesn’t load fast. Website speed is an important factor for both user experience as well as SEO. Changing your theme can be an important factor to improve it.
However, in order to make sure you are actually changing something for the better, make sure to establish a benchmark first. There is no use going through all the trouble if you end up with worse results. Therefore, run your site through speed testing tools like PageSpeed Insights or Pingdom in order to have a baseline for comparison.

3. Back Up Your Website
Whenever you make big modifications to your website, such as changing your WordPress theme, you should make a backup first. That way, if anything goes wrong, you can go back to the earlier status quo.
Even better, go a step further and create a staging or development version of your current website. That way, you can make all the changes you want away from the public eye. A lot of managed hosting providers allow you to do so with a few clicks and also make it easy to deploy the modified website back to the live server. Alternatively, use the WP Staging plugin to create a staging site quickly and easily.
4. Back Up and Document Sidebar and Widget Content
WordPress makes it easy to display different kinds of content in different places via widgets. Common examples are the sidebar, header, or footer.
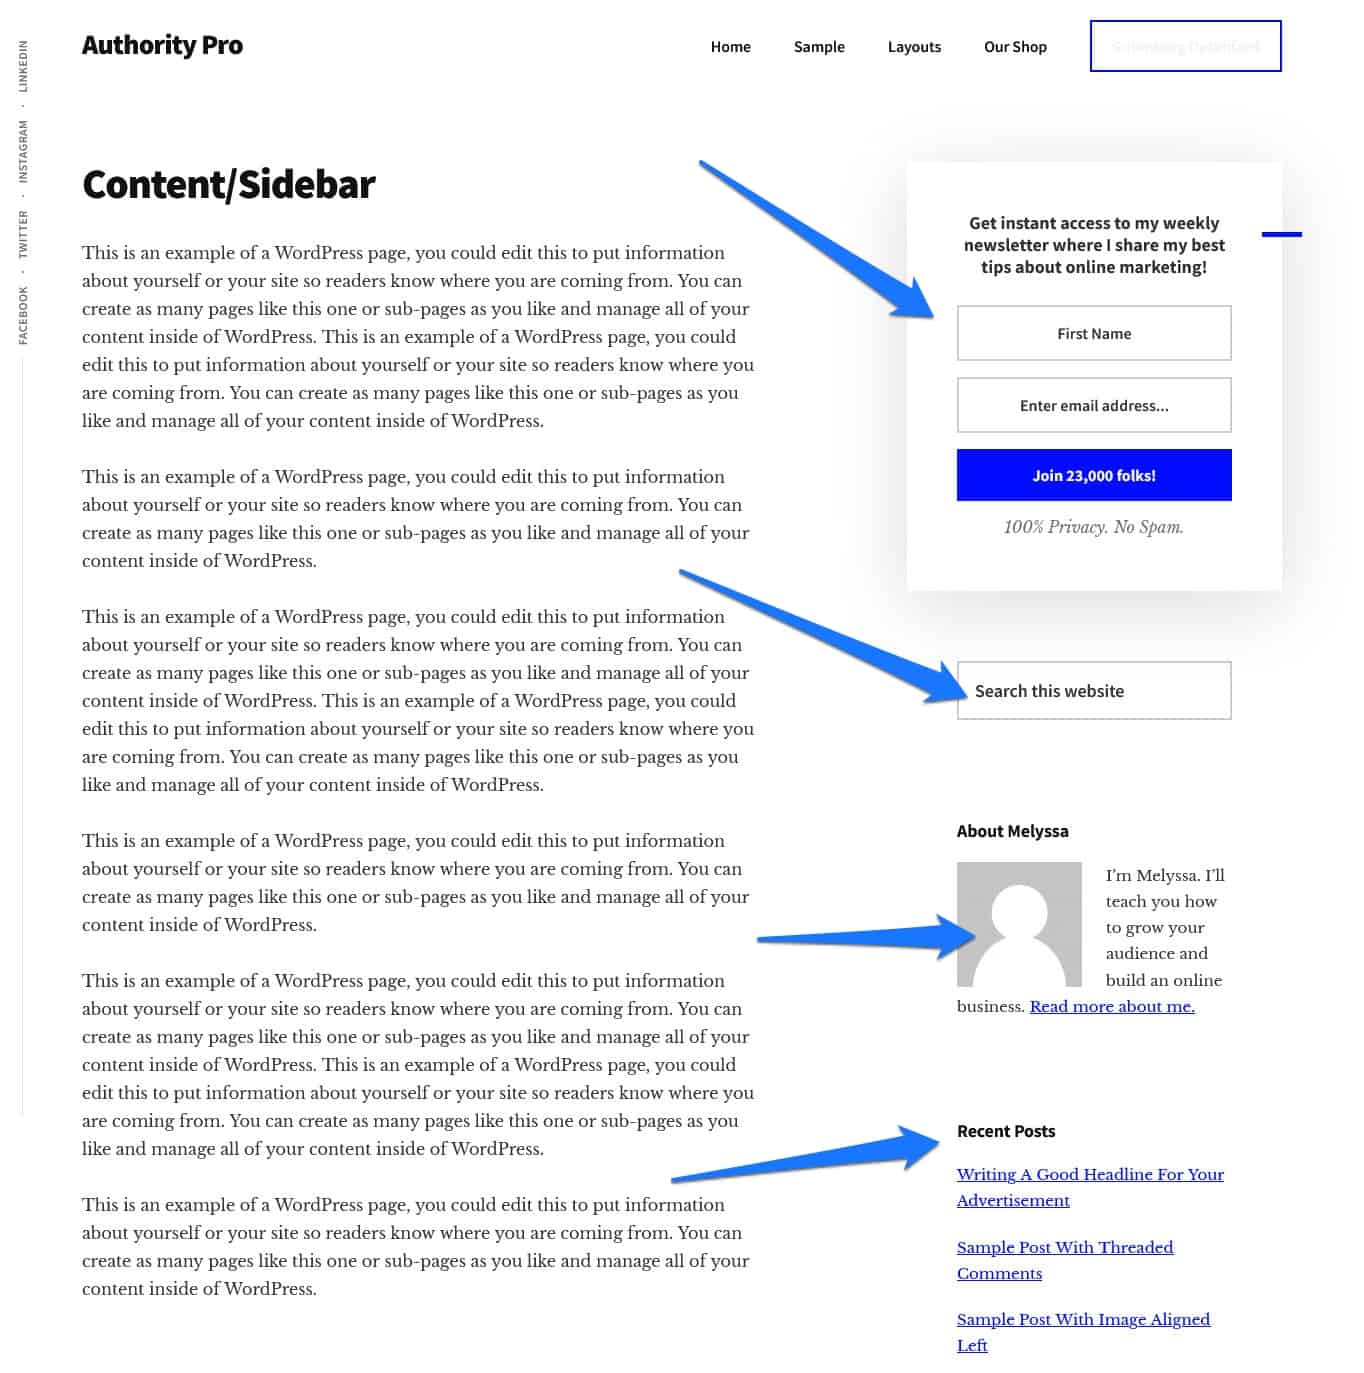
However, it’s possible that the new theme does not support the same content in the same places. In order to not lose it, check your widgets menu (Appearance > Widgets) as well as the front end of your website. Note down what widgets you have where and also copy any custom code that might be present in them to a safe place.
5. Set Your Website to Maintenance Mode
As already mentioned above, the smartest way to do a theme switch is to do it away on a development or staging website. That way, you can make all the mistakes you want without anybody seeing them and only deploy your site back to the live server without any interruption when you are ready.
If you absolutely have to do the changes on your live site, at the very least, set it to maintenance mode. That way, users only see a landing page letting them know that it is currently not available. What they don’t see is a half-finished, work-in-progress site while you figure out how to change to your new WordPress theme.
How to Switch Themes in WordPress
From here on out we will go over the step-by-step process of actually making the switch.
1. Install the New Theme
In order to make a switch to another WordPress theme, you first have to install it. This happens under Appearance > Themes. At the top of the screen here, you find a button that says Add New.
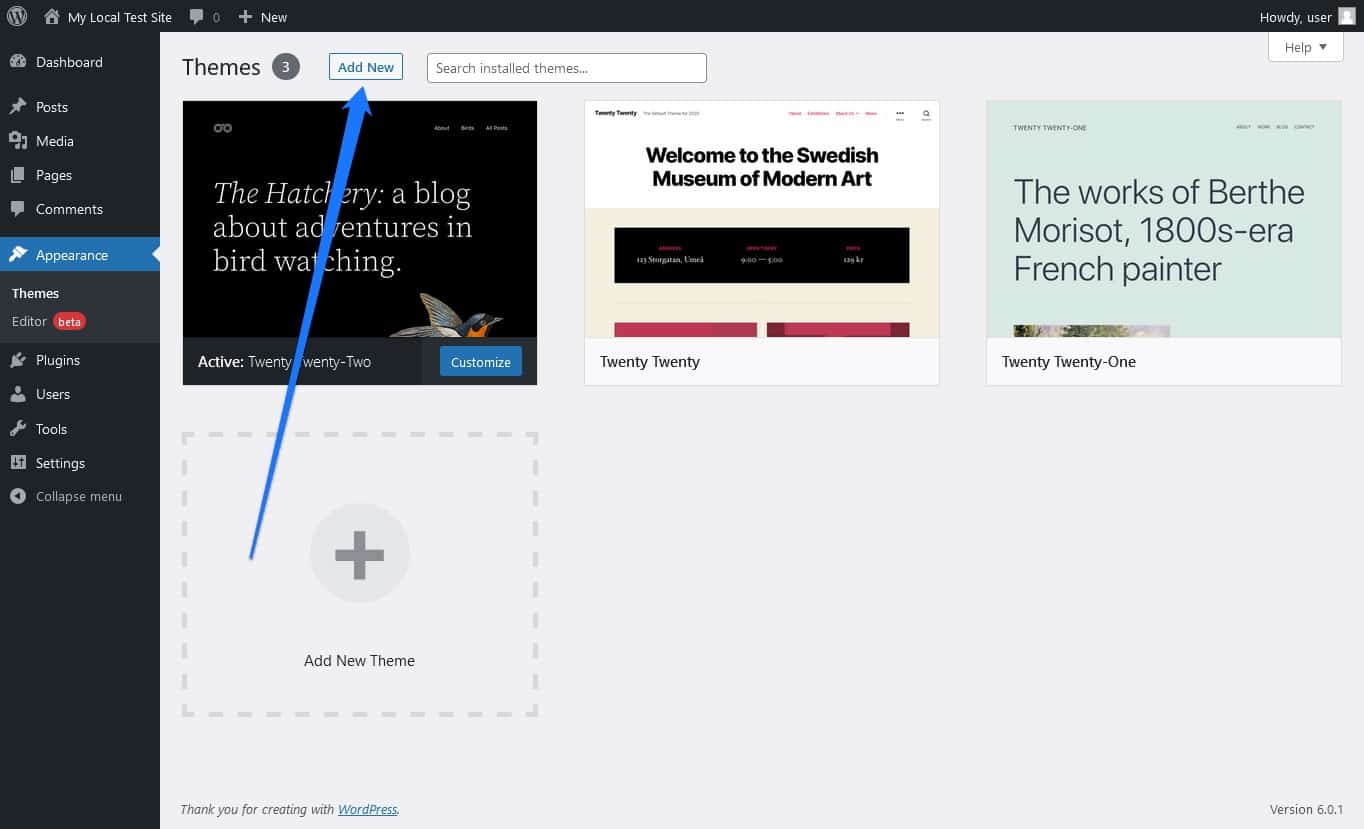
When you click it, you get to a screen where you can access all themes currently available in the WordPress theme directory.

Use the search field in the top right to look for any theme by name. After it appears, hover over it and click the Install button that appears.
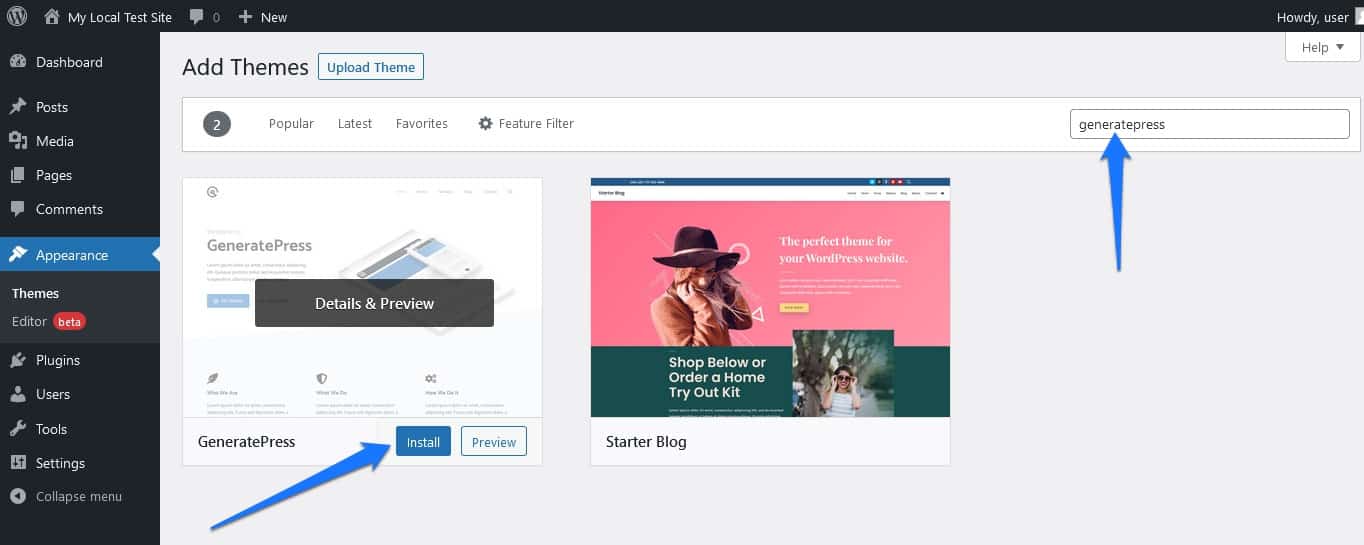
Wait until it has finished installing and you are done.
Alternatively, if working with a premium theme you purchased and downloaded to your hard drive, use the Upload theme button at the top to open an upload form.

Click the Browse button, navigate to the location of your new theme (it needs to be in form of a zip file), and pick it, then click Install Now to achieve the same result.
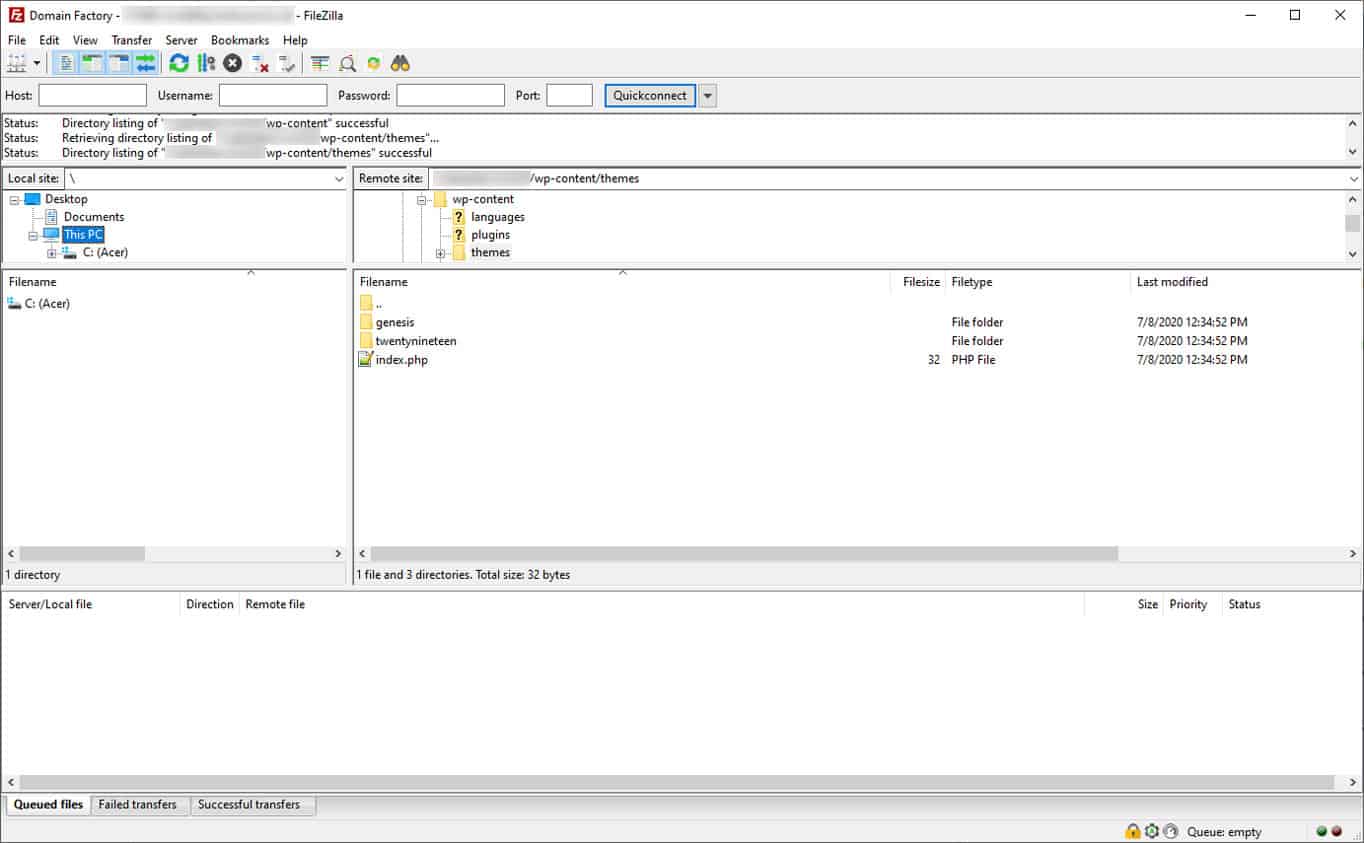
Finally, you can also upload themes via FTP. For that, simply unpack them, then use an FTP client to connect to your server. Find the themes folder inside wp-content and upload the theme (inside its containing folder, e.g. twentytwentyone) to it.
2. Preview Your Theme Without Switching It First
As a first step to see what the new theme will look like on your website, you preview it. Go back to the Themes menu, hover over the new theme, and click the Live Preview button that appears.
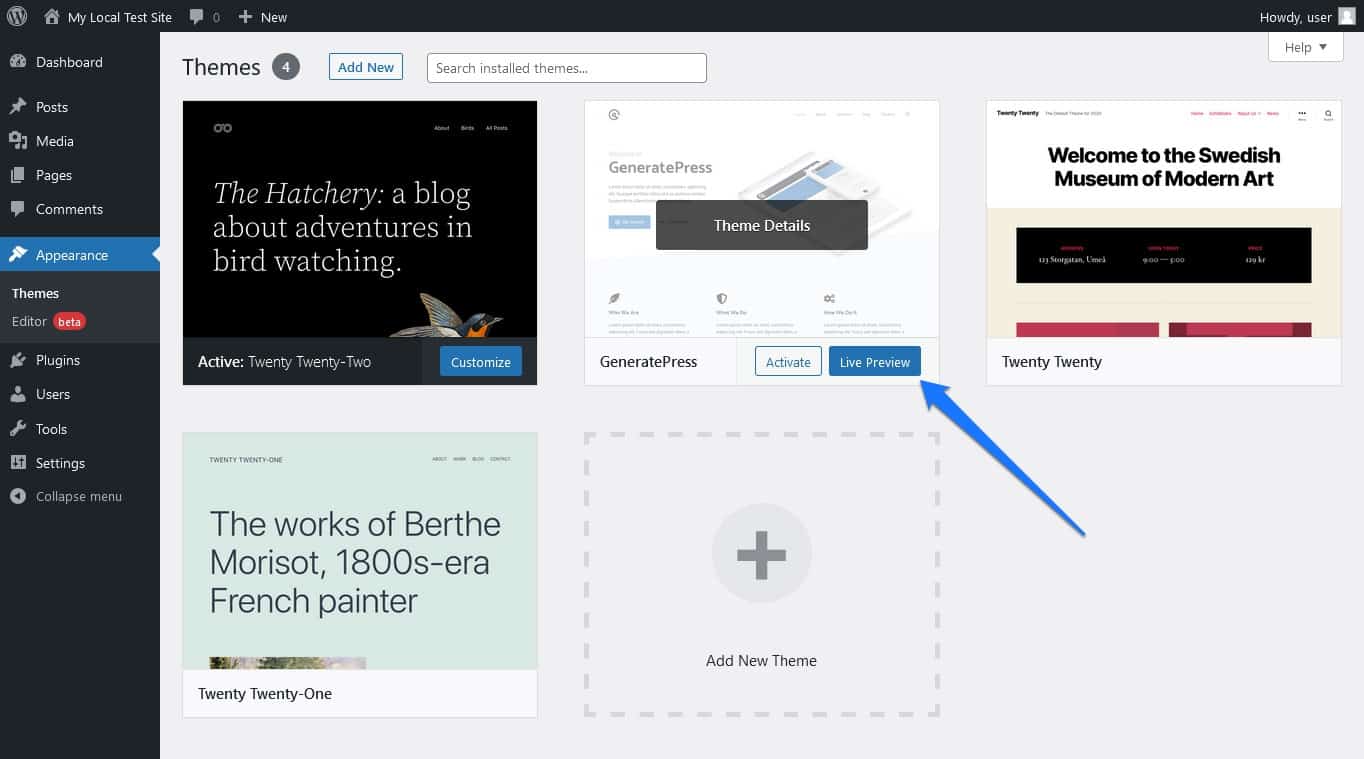
This will show you a version of your website with the new theme.
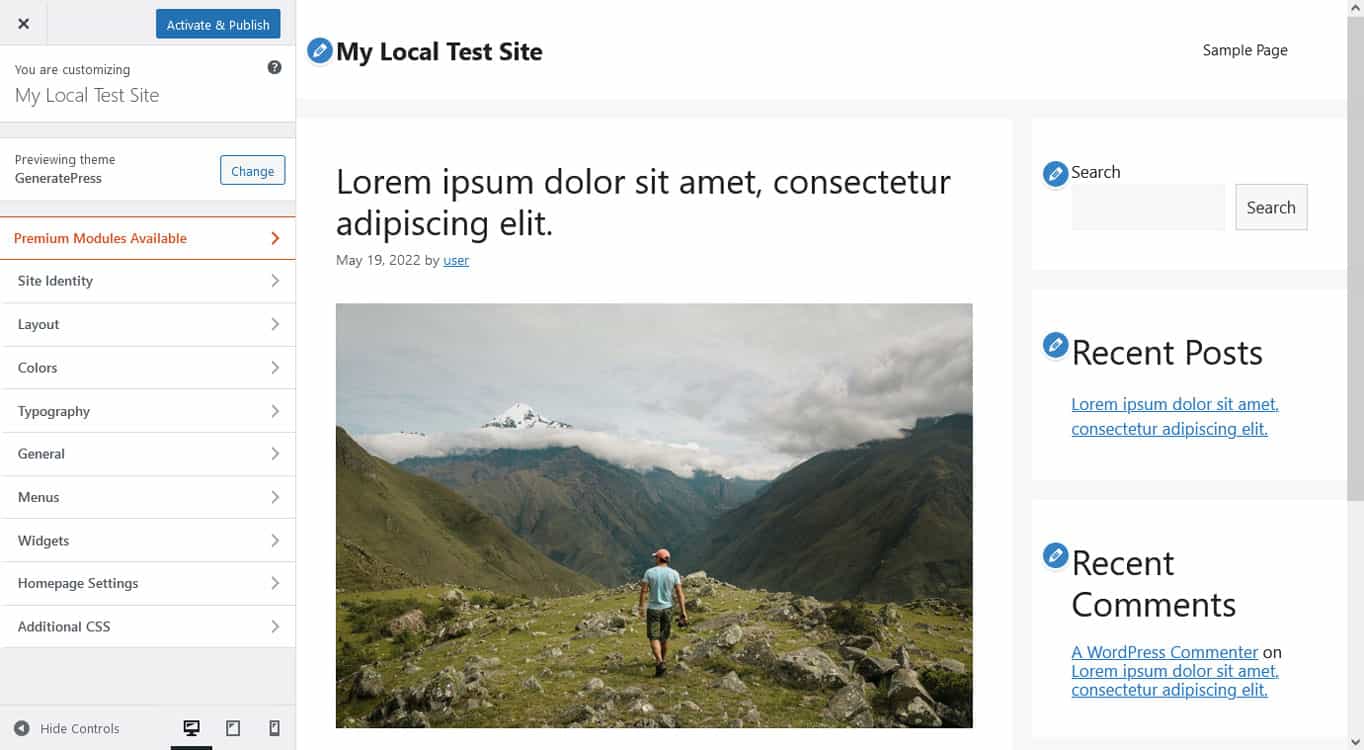
Examine the new look, and click your way through to see how subpages and other parts of your site appear. You are even able to try out changes to its design and content on the left side.
Another alternative is the Theme Switcha plugin. It allows you to do the same thing as above, however, in a new browser tab. That way, you can see what your site will look like in real life instead of the WordPress back end.
Previewing your theme allows you to spot issues without making any changes. It also lets you better prepare for the work ahead.
3. Change Your WordPress Theme
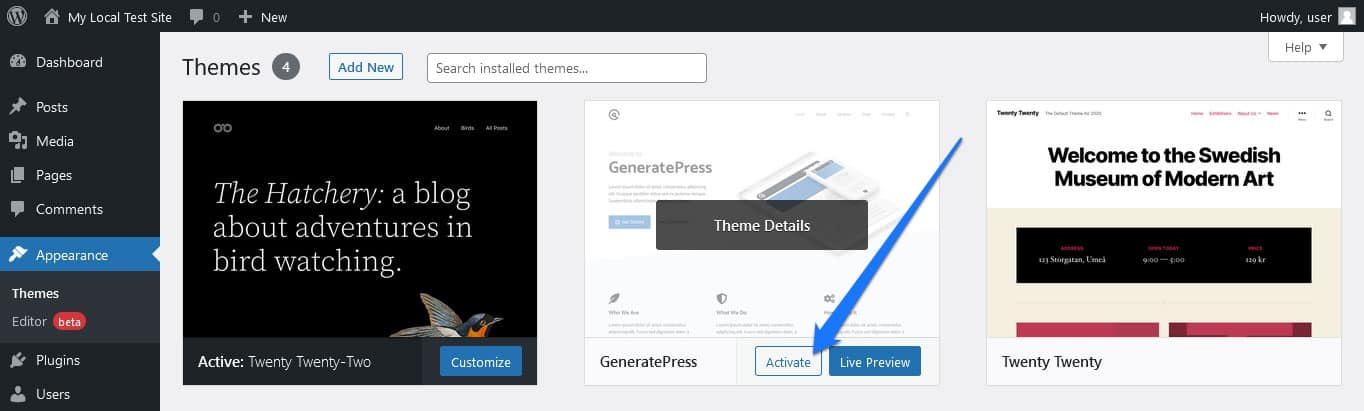
If you are satisfied with what you see, it’s time to actually change the theme. From the WordPress back end, that’s really easy. In the Themes menu, simply hover over the theme you want to switch to with your mouse, then click on Activate – that’s it.
Alternatively, you can also click Activate & Publish in the live preview window. This has the same effect.
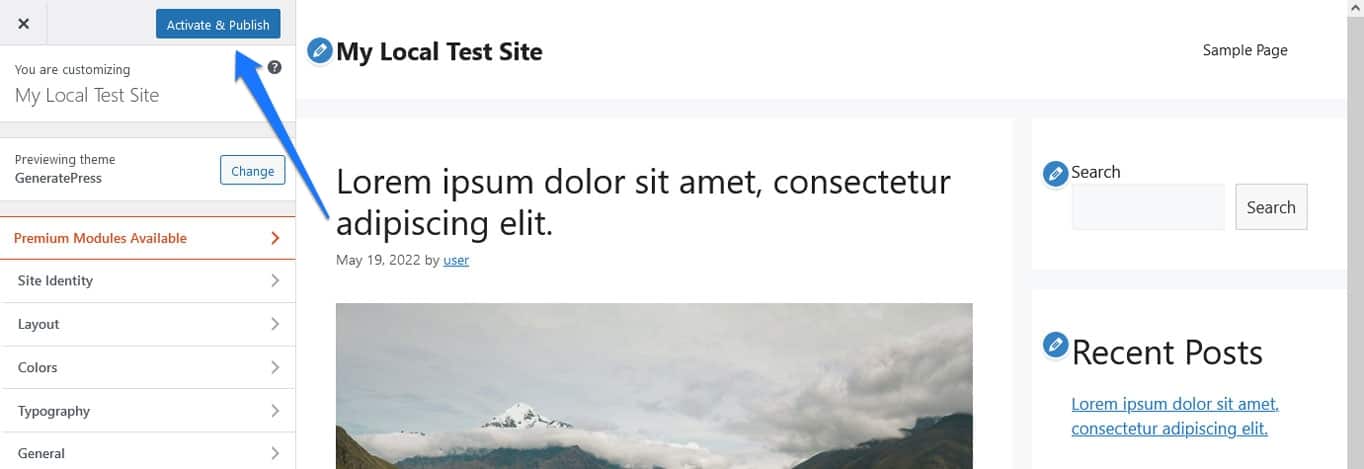
Either way, WordPress should now automatically switch your site to the new theme.
However, what if an error makes the WordPress back end inaccessible? In that case, you can not change your theme as mentioned above. However, don’t despair, there is another way.
For that, you first need to know the name of the folder your new theme is located in. Hopefully, you noted that down when you uploaded it earlier.
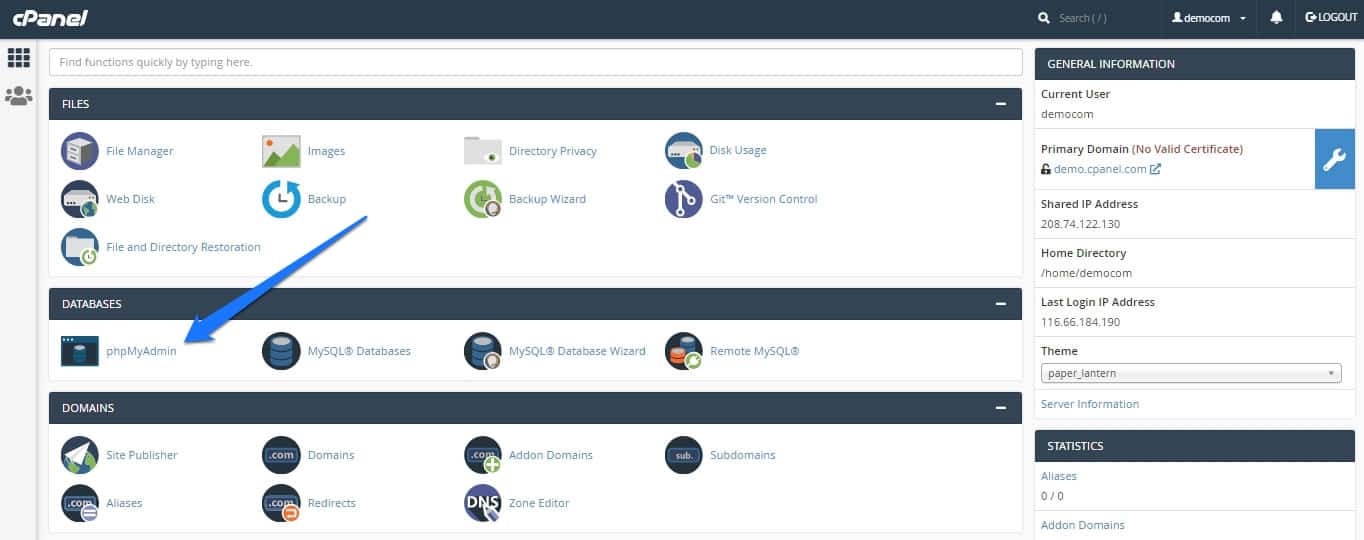
If you did, the next step is to access your website’s database. This most often happens via phpMyAdmin or a similar MySQL management tool, which you usually access through the management platform of your hosting provider.
Once you have access to your database, find and click on the wp_options table (it might have a different prefix than wp_, depending on your installation).
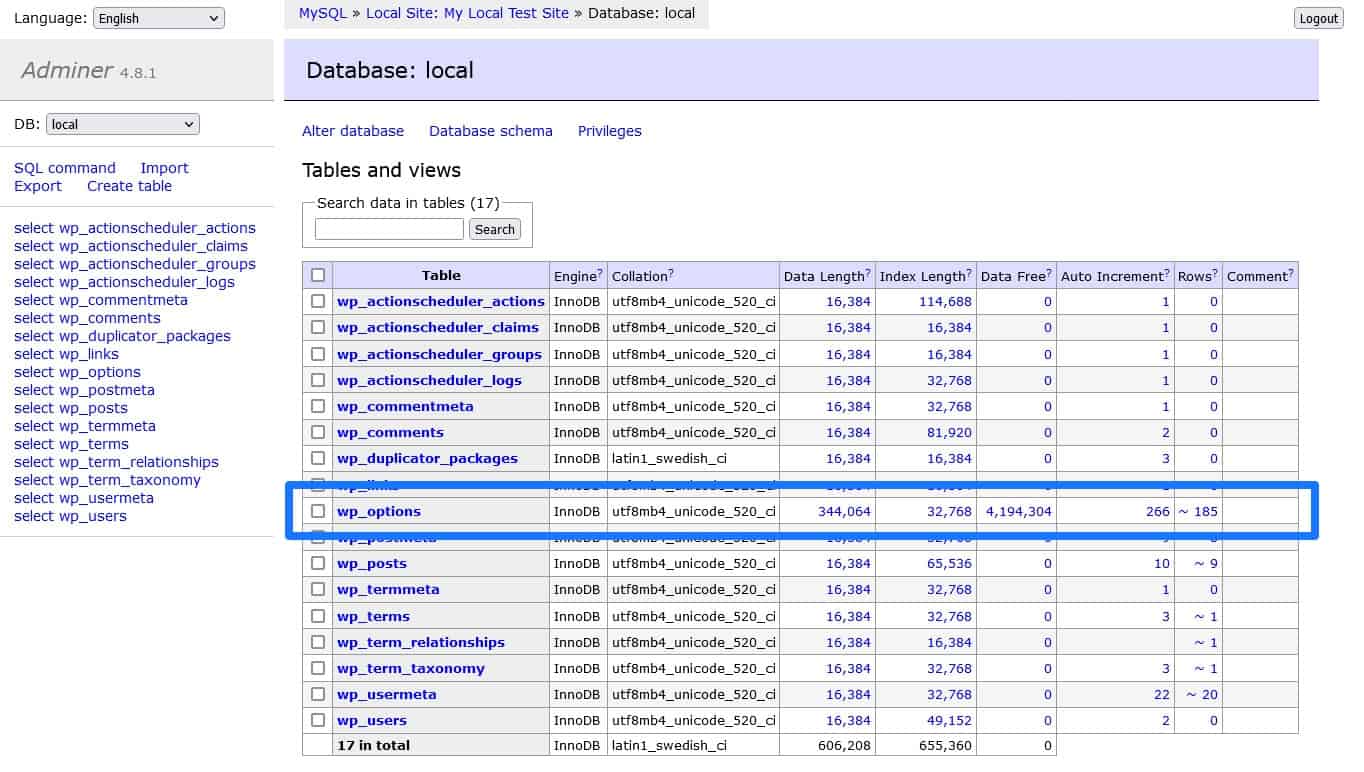
Here, find the two rows called template and stylesheet.

You can already see that they have theme names as their option_value. All you need to do is click Edit, then input the name of the theme you want to use (meaning its folder name) and save.
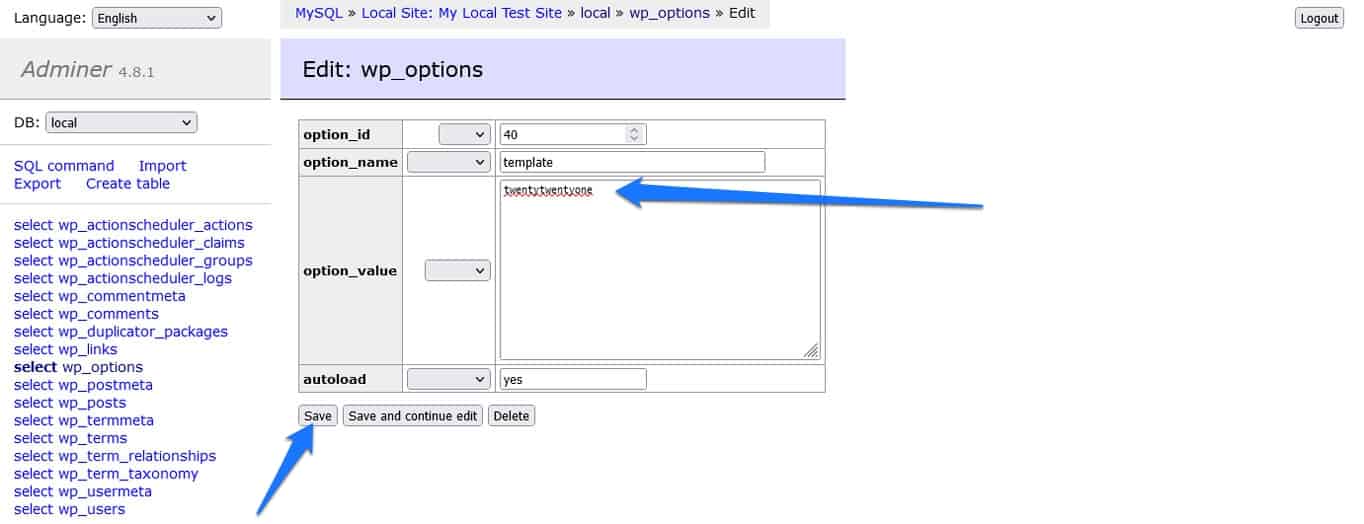
Once you have completed that for both rows, your WordPress website should be sporting the new theme.
4. Check for Issues
Once the theme switch is complete, it’s time to test if everything is working correctly. In particular, go over these points:
- Check your site — Test plugin functionality, look if your widgets are in the right place and contain the desired content and if your images display. Test your contact forms and make sure your navigation links all lead where they are supposed to. While the theme should usually only change your design, there can be some unforeseen issues and it’s best to spot them early.
- Look for design issues — Besides functionality, also see if you can spot any design issues. For example, you might have customized the layout of a form for your old theme that now no longer looks as intended. Also, make sure that your favicon works as it should.
- Examine your images — A common occurrence is that you have images in theme-specific sizes, especially featured images, that now no longer work as intended. If that is the case, reGenerate Thumbnails Advanced is a good option to recreate image sizes as needed.
- Add back your code snippets and tracking codes — Remember all the custom functionality you copied from your old theme earlier? Now it’s time to bring them back in, at least as much as makes sense. At the very least, you should add back any tracking codes that you had in your old theme (maybe this time in the form of a custom plugin?). The rest depends on whether your code snippets were custom-made for the old theme or not.
5. Put Your Site Back Online
If the changed theme passes your initial checks, it’s time to put it live. Here, your method depends on how you handled it in the first place.
If you did all the work above in a development or staging site, you need to move your entire site or simply push the changes live. If you have been working on your live site all along, now is the time to switch off the maintenance mode. That way, your visitors can admire your new design in all its glory.
In addition, if you are using a caching plugin, be sure to clear the cache so your visitors don’t load the old version of your website by accident. The same goes for any caching solutions your host might have in place.
6. Continue Monitoring
Switching your theme will likely bring changes to your website, both good and bad. In order to be able to understand the effect of your modified design, it’s important that you keep an eye on your website’s performance. Specifically:
- Test your page loading time — Make sure that the performance hasn’t gotten worse. If your speed has suffered, follow our tips for speeding up your website.
- Monitor the bounce rate — In your analytics solution, keep an eye on the number of people who leave your site after only one page. This is an important indicator of the effectiveness of your design and content and can tell you if you need to further improve your website.
In short, keep an eye on your website and its metrics so you can take corrective action if necessary.
Switch Your WordPress Theme the Right Way
Theoretically, changing your WordPress theme is a matter of a few clicks. However, on established websites with lots of content, there are extra considerations.
By being aware of potential complications and taking steps to prevent problems, you give yourself a better chance of making the process as smooth as possible.
It’s also not very complex, as you have hopefully seen above. Doing so mainly consists of making a backup of important parts and your site as a whole, testing the new theme thoroughly, and keeping an eye on your site performance afterward. Enjoy your new theme!
Do you take additional steps when you change your WordPress theme? Please share any additional tips you have in the comments below!
The post How to Safely Change Your WordPress Theme (Beginner’s Guide) appeared first on WebsiteSetup - How to Make a Website.
Comments
Post a Comment