Looking for a way to create a Mailchimp form on your WordPress website?
Mailchimp is a popular platform for creating and managing your email marketing list. It’s free and comes with an in-built form builder.
However, Mailchimp forms are quite basic and do not offer enough styling options to match your website style.
In this tutorial, we’ll overcome the issues faced while using a default Mailchimp form. Moreover, you’ll find an easy way to create a Mailchimp form with a WordPress plugin.
How to Create a Mailchimp Form in WordPress
We’ll use OptinMonster to create a beautiful Mailchimp form.

OptinMonster is a premium WordPress plugin that you can use for creating Mailchimp forms, inline forms, popups and more.
You might be thinking, “Why to use OptinMonster instead of the default Mailchimp form?”
The answer is pretty straightforward.
Mailchimp is suitable for handling emails. But it lacks the necessary customization and styling settings for creating beautiful forms.
OptinMonster, on the other hand, comes with a drag and drop builder. This enables you to design forms that match your website.
You also get access to 50+ pre-built form templates that you can choose for your campaigns.
Oh! There’s a new way to create successful campaigns.
Many marketing techniques and efforts went into creating these Playbooks to save your time.

Instead of building a campaign from scratch, Playbooks allows you to copy the entire campaign.
For this tutorial, we’ll use an OptinMonster inline form and integrate it into Mailchimp.
Here’s a final look of our form.

Inline forms are proven to be one of the best methods for collecting emails and growing subscribers.
A few reasons that make OptinMonster stand out from other Mailchimp form builder plugins:
- Automatic embedding: Once the form is created, you don’t even have to manually embed it on the WordPress site. It gets added to all posts, pages, or any categories based on your selection.
- Widgets: Embed forms on any widgetized area of your WordPress site, including sidebar, homepage widget-ready area, and more.
- WordPress-specific targeting: You can only choose to show your campaigns on post categories, tags or based on user roles (such as admin, subscriber, editor), post types (example: posts, pages, custom post types), or even target based on various WooCommerce settings.
If you are still unconvinced, check out this case study on how Lilach Bullock converts 57% of visitors using OptinMonster’s inline campaigns.
Now is the best time to get started with OptinMonster. What are you waiting for?
Let’s dive into this step by step guide for adding Mailchimp form using OptinMonster.
Step 1: Install and Activate the OptinMonster Plugin
The first thing is to install and activate the OptinMonster plugin.
If you’re using OptinMonster for the first time, sign up for an account.
Now, you can install the OptinMonster plugin from your WordPress admin dashboard.
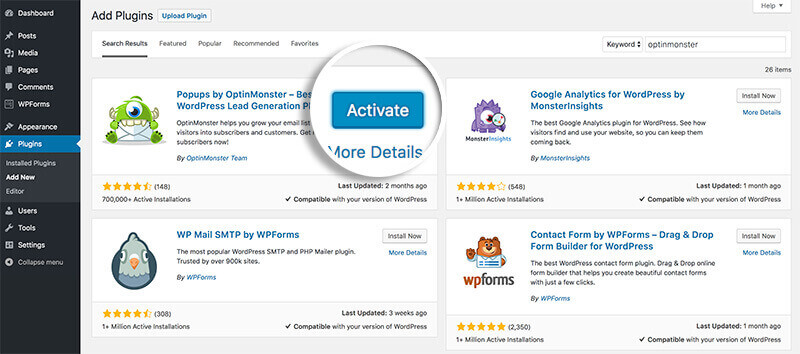
Go to Plugins » Add New.
Search for OptinMonster. Install and activate the plugin.
If you’re installing a plugin for the first time, consider checking out how to install a plugin guide.
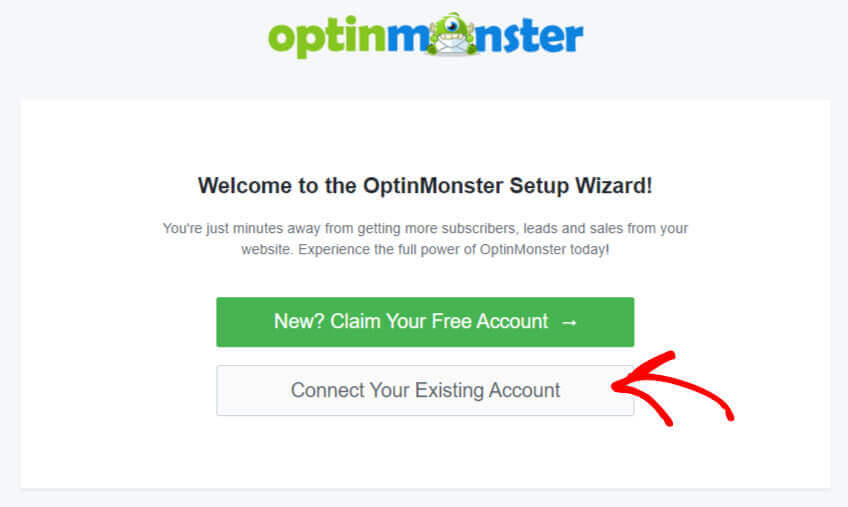
After activating the plugin, you’ll see a setup wizard.
Click on Connect Your Existing Account.
Next, a popup will appear and simply click on Connect To WordPress button.
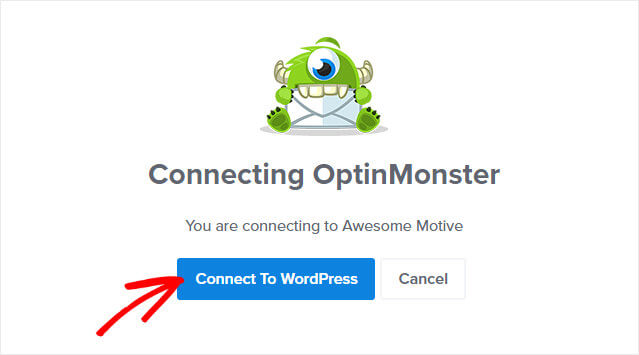
That’s it.
You’ve connected your OptinMonster account to your website.
Now, it’s time for creating a Mailchimp form campaign.
Step 2: Create a Campaign
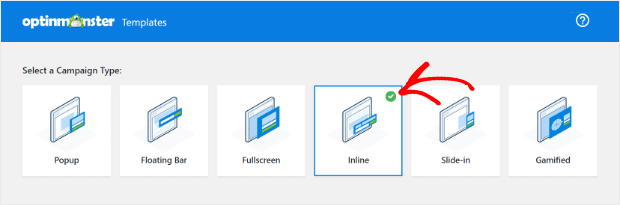
Click on the Campaigns menu from the OptinMonster dashboard.
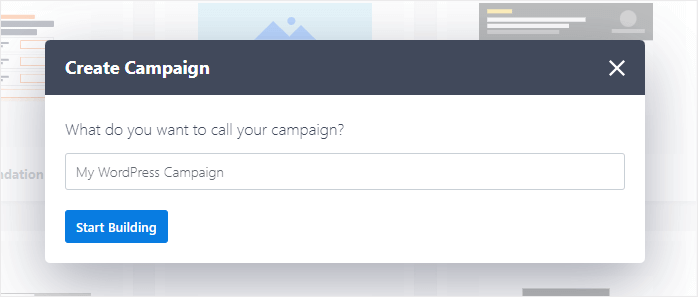
You’ll see a popup for creating your first campaign.

In the campaign type category, we’ll select inline form.
Below, you can select a form from over 50 templates. All these templates are designed by experts to help you convert more leads.
Every template has a preview button, so you can check the template before using it.
We’ll go with the basic template in this tutorial.
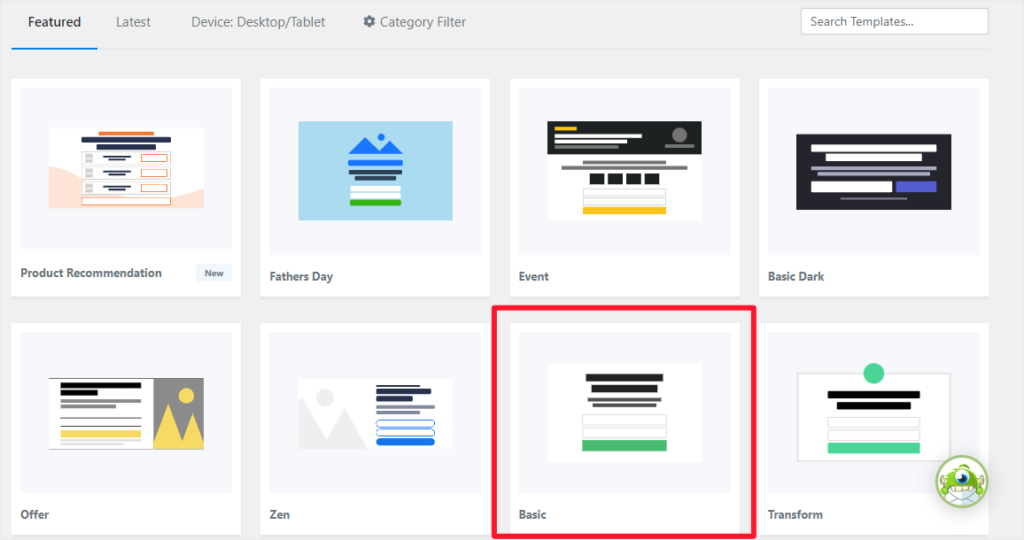
Add a name for your campaign and click on the Start Building button.
That was quick and easy. Isn’t it?
It’s time to start customizing our Mailchimp Form.
Step 3: Customize Your Mailchimp Form
OptinMonster provides an easy to use drag and drop builder for customizing forms.
Simply hover on the form, and you’ll see the icons for editing each block.
Click on the text field to edit or change the text.
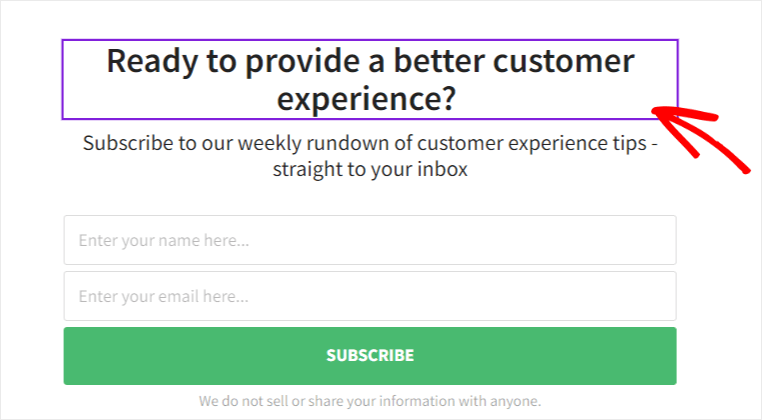
On the left-hand side, you’ll get all the settings for customizing the styling of the blocks.
OptinMonster’s drag and drop builder makes it easy to add and edit all the blocks, so you won’t find any difficulties creating your inline Mailchimp form.
Follow the same process for editing the optin fields and button blocks.
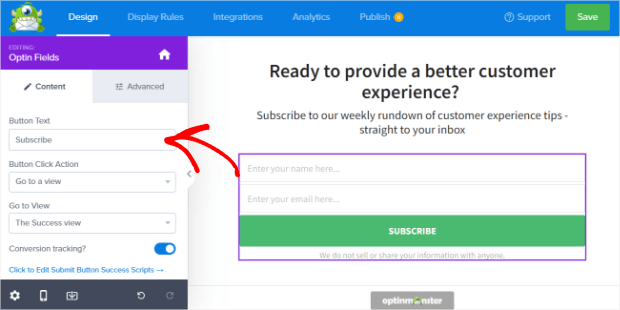
If you’d like to add any extra blocks, simply drag and drop the block from the left side into your design.
We highly recommend to check out this detailed guide on creating your first OptinMonster campaign. This guide will help you to customize the form and understand the targeting rules for campaigns.
Once you set the display rules, we can start integrating our form to Mailchimp.
Step 4: Connect the Form with Mailchimp
OptinMonster makes it easy to connect forms to Mailchimp.
Click on the Add New Integration button from the left-hand side menu within the integrations tab.
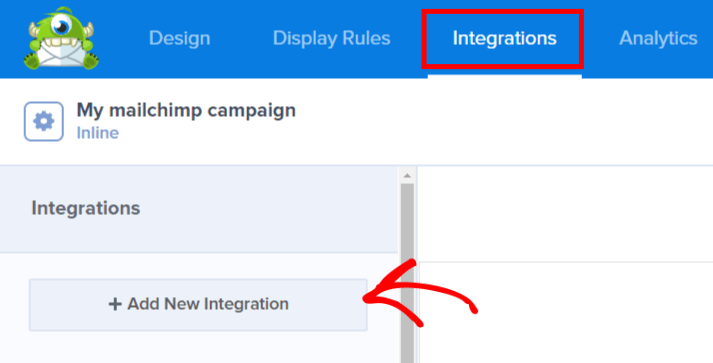
Select Mailchimp from the list of email providers.
Next, you’ll need to add an account and provide a Mailchimp API key. You can register for a new Mailchimp account if you don’t have an account.
For the API key, log in to your Mailchimp account.
Navigate to the Account » Extras » API Key page from your profile.
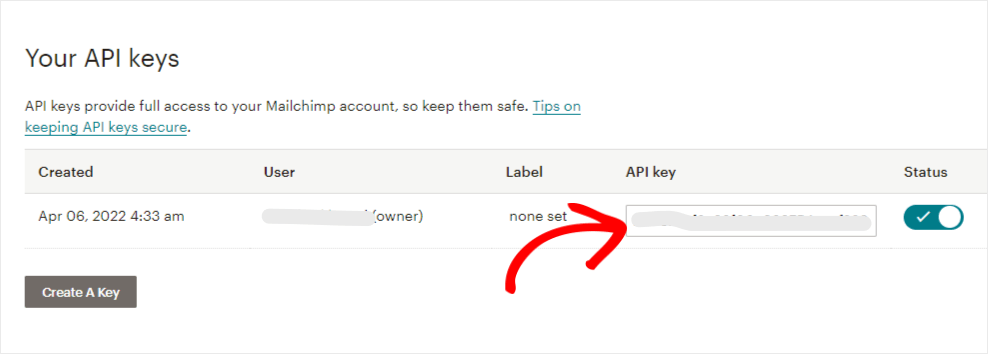
Click on Connect to Mailchimp after adding the API key.
Once you’ve connected with Mailchimp, select Email Provider Account and Email Provider Lists.
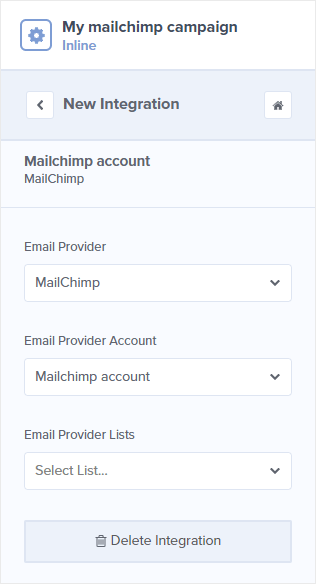
Click on Save button.
Now, you’re all set for the next step.
Step 5: Publish Your Mailchimp Form in WordPress
The final step is to publish the campaign that you’ve created.
For this, open the Publish tab.
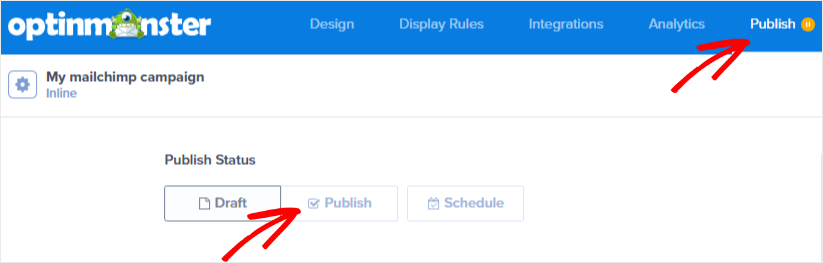
It’s always good to check everything before hitting the Publish button. Click on the Save button on the right-hand top corner to ensure everything is saved.
You can also check the full campaign summary on the right-hand side.
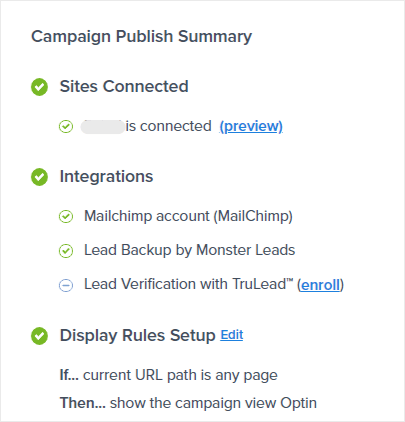
Once you’ve verified everything is correct, feel free to Publish the campaign.

The last step is to embed the form on your website.
Scroll down to copy the inline form code.
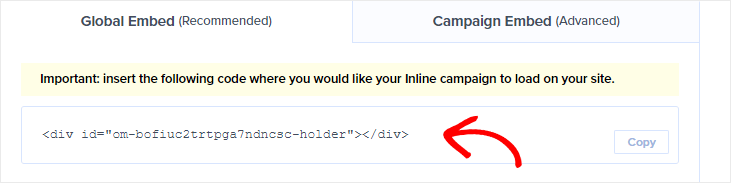
To embed this inline form on your website, you must paste this code into a post or page.
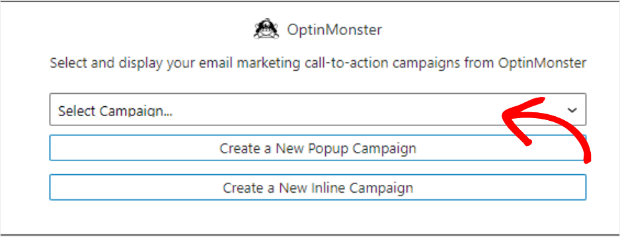
Search for the OptinMonster block, if you’re using Gutenberg editor.
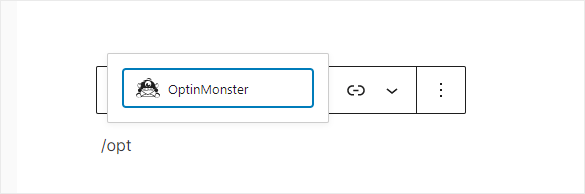
And select the campaign.
Copy the inline form code on any page or post if you still use the classic editor.
Additionally, you can even check out this guide on adding an inline campaign.
Now, this form will be visible to the visitors to your website.
The details will get added to the mailing lists whenever a visitor subscribes using this form.
Here’s the output of the inline form we’ve created.
And with this step, you’ve successfully added a Mailchimp Form with a WordPress plugin.
We hope this tutorial was helpful and easy to follow.
Don’t forget to check out these resources for creating successful email campaigns:
- How to Make a Profitable Follow-Up Campaign to Drive More Revenue
- Small Business Email Marketing: 7 (Easy) Tips for Growth
- 7 Best Email Verification Tools to Improve Deliverability
That’s it for today.
If haven’t signed up for OptinMonster yet, click here to get started!
Comments
Post a Comment